Your webcam may not be working because of blocked permissions, outdated drivers, loose connections, or hardware faults.
If you are asking, “why is my webcam not working,” you are not alone. A camera can fail because of a simple privacy setting, another app using it, a bad USB port, or a deeper driver problem. This guide explains how to find the cause and fix it on Windows, Mac, Chromebooks, browsers, and video apps.
Why Is My Webcam Not Working?
When your webcam stops working, the problem usually falls into one of four groups: software settings, app permissions, connection issues, or hardware failure. Finding the right group is like finding the correct key for a lock. Once you know the cause, the fix is often simple.
Common reasons include:
- The camera is turned off with a physical switch or keyboard key.
- Windows, macOS, ChromeOS, or your browser blocked camera access.
- Zoom, Teams, FaceTime, or another app is using the webcam.
- The webcam driver is missing, damaged, or out of date.
- A USB cable, port, adapter, or hub is faulty.
- The camera is covered, damaged, or no longer detected.
- Security software is blocking camera access.
- The selected camera is not the one you want to use.
A useful first test is to open your computer’s built-in camera app. On Windows, use the Camera app. On a Mac, open Photo Booth or FaceTime. If the webcam works there but not in your meeting app, the webcam itself is likely fine. The issue is probably an app setting or browser permission.

Quick Checks Before Changing Settings
Start with the easy checks. They take only a few minutes and can solve many cases of why your webcam is not working.
- Remove the lens cover or privacy shutter. Many laptops have a tiny slider near the camera.
- Check for a camera key on your keyboard. It may show a camera icon and require the Fn key.
- Restart the computer. This closes stuck camera processes and reloads system services.
- Close every app that may use the camera, including Zoom, Teams, Skype, Discord, and browser tabs.
- Unplug an external webcam and connect it to another USB port.
- Remove USB hubs and adapters for the first test.
- Clean the camera lens with a soft, dry microfiber cloth.
- Check whether the camera is selected correctly in your meeting app.
I often see people skip these checks and begin reinstalling drivers right away. That can waste time. A closed shutter or a camera that is still selected in another app is far more common than a damaged driver.

Fix Webcam Permissions in Windows
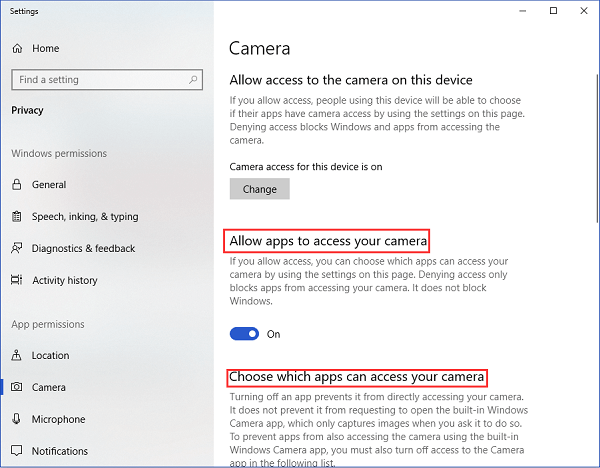
Windows controls camera access through privacy settings. If access is blocked, the camera may show a black screen, a crossed-out camera icon, or an error message.
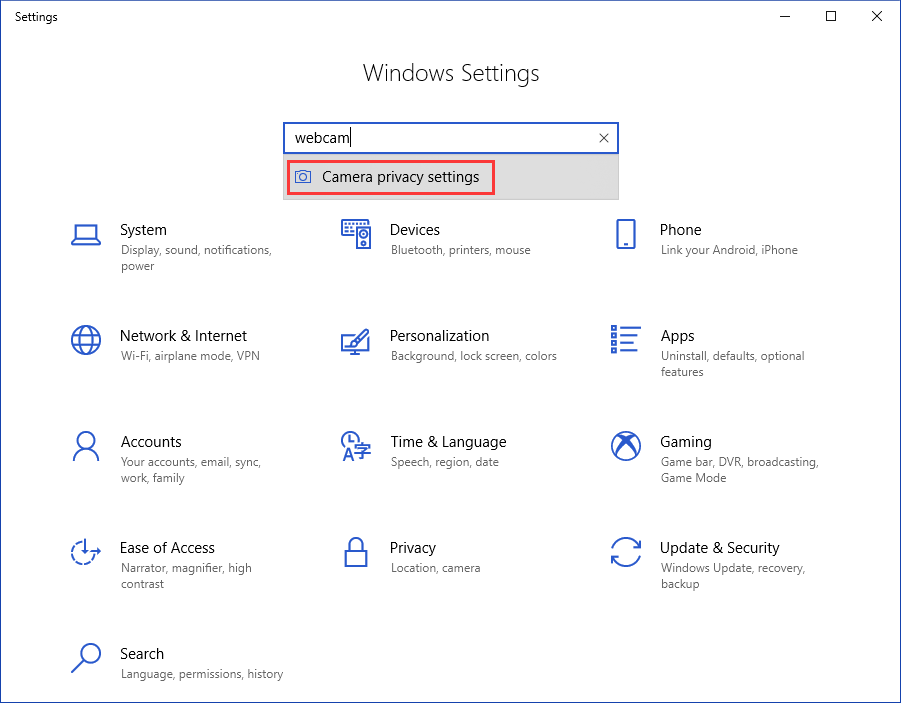
To check camera permissions in Windows 11:
- Open Settings.
- Select Privacy & security.
- Choose Camera.
- Turn on Camera access.
- Turn on Let apps access your camera.
- Turn on Let desktop apps access your camera.
The last setting matters because many video tools are desktop programs, even if they open in a normal window. Zoom, Microsoft Teams, browsers, and other programs may need desktop camera access.
If only one app has a problem, look for that app in the permissions list. Turn access off, restart the computer, and turn it on again if the setting appears stuck.
Windows also has a built-in camera troubleshooter in some versions. Open Settings, select System, choose Troubleshoot, and then select Other troubleshooters. The exact menu can vary after a Windows update.

Fix Webcam Permissions on a Mac
macOS asks for permission before an app can use the camera. If you clicked “Don’t Allow” in the past, the app may continue to show a blank image.
To review camera access:
- Open the Apple menu.
- Select System Settings.
- Choose Privacy & Security.
- Select Camera.
- Turn on access for the app you want to use.
- Quit and reopen the app.
On older Mac versions, these controls may appear under System Preferences and Security & Privacy. The labels can differ, but the camera permission area works in much the same way.
Also check Screen Time restrictions if the camera option is missing or apps cannot access it. A work or school administrator may control these settings. In that case, you may need to contact the administrator rather than change the setting yourself.
Check Your Browser Camera Settings
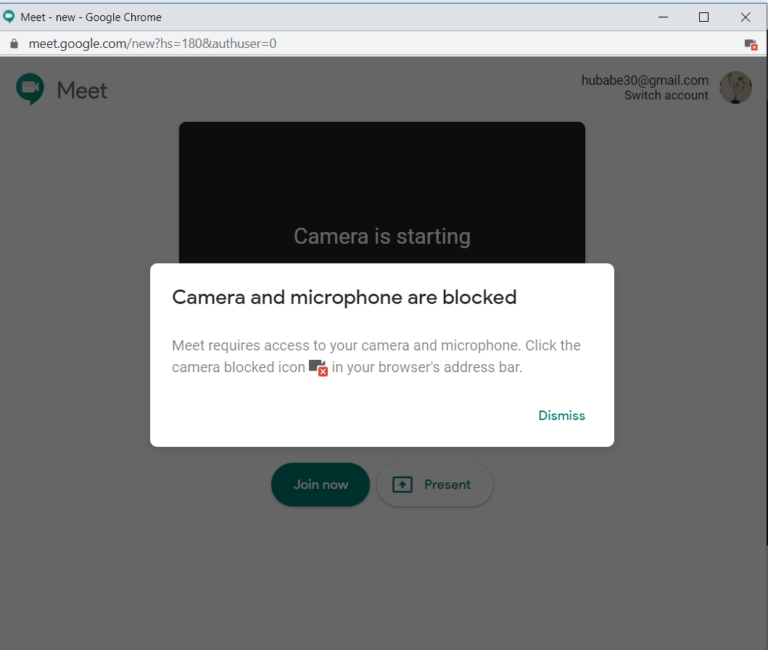
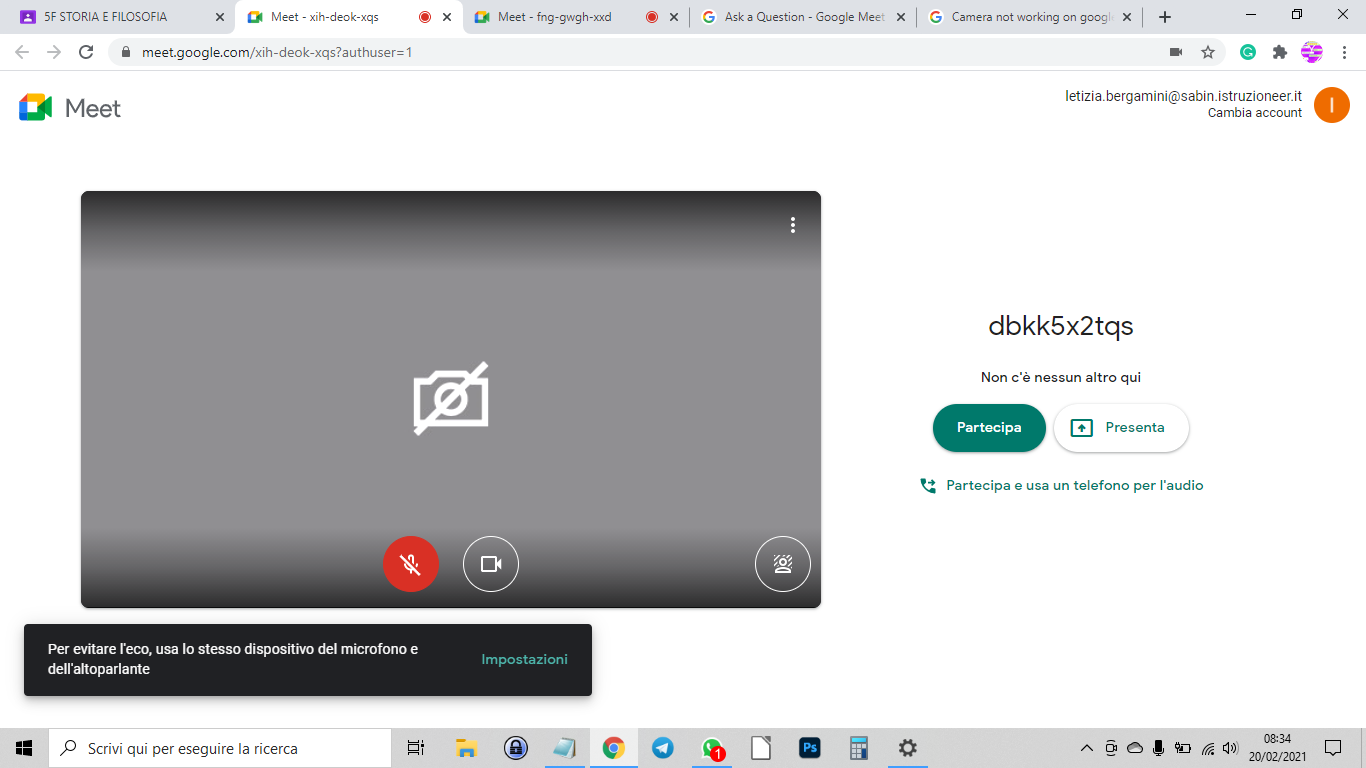
If your webcam works in an app but not on a website, the browser may be blocking it. This is common with Google Meet, browser-based Teams, online interviews, and telehealth sites.
In Chrome:
- Open the website that needs the camera.
- Select the lock or settings icon beside the address bar.
- Open Site settings.
- Set Camera to Allow.
- Select the correct camera.
- Reload the page.
In Microsoft Edge, open Settings, choose Cookies and site permissions, and select Camera. In Firefox, select the camera icon in the address bar and allow access for the site.
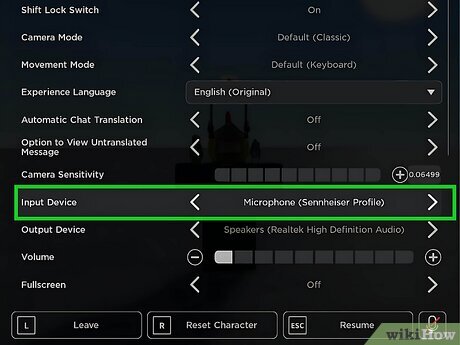
A website may also have its own camera selector. Open the meeting settings and choose your built-in or external webcam. If the wrong device is selected, the site may display a black screen even though your camera works.
Avoid allowing camera access on sites you do not trust. Camera permission lets a site request video access, so review the address before selecting Allow.

Choose the Correct Camera in Your App
Many computers have more than one video device. You may have a built-in webcam, an external USB camera, a virtual camera, or a capture card. The app may simply be using the wrong one.
In Zoom, open Settings, select Video, and choose the camera from the Camera menu. In Microsoft Teams, open Settings, choose Devices, and select the correct camera. In Google Meet, open the three-dot menu, select Settings, and choose Video.
Look for a live preview. If one camera shows a clear image and another shows a black screen, select the working device. You can then remove or disable the problem device later if needed.
A virtual camera can also create confusion. Programs such as streaming tools may install virtual camera drivers. Close those programs temporarily and test the built-in webcam again.
Update or Reinstall the Webcam Driver in Windows
A driver helps Windows communicate with the webcam. If the driver is missing or damaged, the camera may disappear or display an error.
To check the driver:
- Right-click the Start button.
- Open Device Manager.
- Expand Cameras or Imaging devices.
- Look for your webcam.
- Right-click it and choose Update driver.
- Select Search automatically for drivers.
If the webcam has a warning symbol, Windows has found a device problem. You can also select Uninstall device, restart the computer, and let Windows reinstall the driver.
Do not download random drivers from unfamiliar websites. Use Windows Update or the computer maker’s official support page. Laptop makers such as Dell, HP, Lenovo, ASUS, and Acer often provide tested camera drivers for a specific model.
If the camera does not appear in Device Manager, check View and select Show hidden devices. If it still does not appear, the issue may involve the USB connection, firmware, BIOS settings, or the camera hardware itself.
Test an External USB Webcam
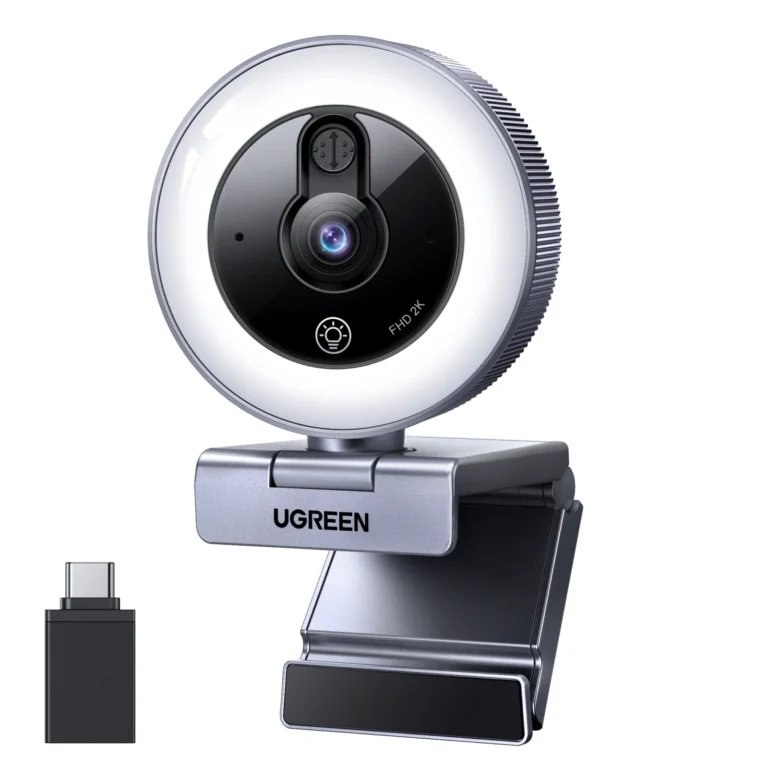
External webcams are easy to replace, but their cables and ports can fail. If you are asking why your webcam is not working and you use a USB model, test the connection before changing software settings.
Try these steps:
- Disconnect the webcam.
- Restart the computer.
- Connect the webcam directly to the computer.
- Test a different USB port.
- Avoid a USB hub or docking station.
- Try the webcam on another computer.
- Check whether the camera needs a separate power cable.
- Test another USB cable if the cable can be removed.
If the webcam works on another computer, your first computer likely has a permission, driver, or port issue. If it fails on every computer, the webcam or its cable may be defective.
Some high-resolution webcams need more power than a weak hub can provide. A direct connection often fixes random freezing, flickering, or disconnection.

Fix a Black Screen, Frozen Image, or Poor Video
A webcam can be detected but still show a black, frozen, or poor-quality image. This is a different problem from the camera not being detected.
For a black screen, check the privacy shutter, camera selection, app permissions, and lighting. Bright light behind you can make your face look dark, but it should not create a fully black image.
For a frozen image, close other camera apps and restart the video app. Slow internet can affect what others see, but it normally does not stop the local camera preview. If the preview itself freezes, suspect the app, driver, USB port, or camera.
For poor video quality:
- Clean the lens.
- Add light in front of your face.
- Move away from a bright window behind you.
- Improve your Wi-Fi connection.
- Close programs using heavy system resources.
- Check the camera resolution in the app.
- Install system and app updates.
Camera quality also depends on the room. A basic webcam can look clear in good light and grainy in a dark room. This is a limitation of the sensor, not always a fault.
Check Security Software and Privacy Tools
Antivirus programs, privacy tools, and company security policies can block camera access. These tools may protect you from unwanted recording, but they can also prevent trusted apps from working.
Open your security software and look for settings named Webcam Protection, Camera Privacy, Device Control, or Application Permissions. Add your meeting app to the trusted list only if you recognize it and downloaded it from a safe source.
Do not disable all security protection permanently. If you test by turning a feature off, turn it back on after the test. On a work computer, camera restrictions may come from an administrator policy, endpoint security program, or mobile device management system.
A small camera indicator light is useful. If the light turns on when you open a trusted app, the camera is receiving power. If it remains on after every camera app closes, review running apps and restart the computer.
Check macOS, Windows, and App Updates
Updates can fix bugs that affect camera access. They can also change privacy settings or app behavior, so check the settings again after a major update.
Install updates from official system tools:
- Windows: Open Settings, select Windows Update, and check for updates.
- macOS: Open System Settings, select General, and choose Software Update.
- ChromeOS: Open Settings, select About ChromeOS, and check for updates.
- Video apps: Use the app’s built-in update option or its official download page.
If the problem began immediately after an update, restart the computer first. Then check the camera permissions and selected device. In rare cases, a new driver can create a conflict. A system restore point, manufacturer driver, or later patch may resolve it.
Keep your browser updated too. Video websites depend on browser permissions, media controls, and WebRTC support. An old browser can cause camera errors even when the operating system sees the webcam.
When the Webcam May Be Broken
Sometimes the answer to why your webcam is not working is physical damage. A broken camera may show no image on any computer, disappear from device lists, or disconnect when the cable moves.
Signs of hardware failure include:
- The camera is not detected on multiple computers.
- The USB cable feels loose or damaged.
- The image has permanent lines, colors, or cracks.
- The camera stopped after a drop or liquid spill.
- The privacy shutter is stuck.
- The camera disconnects when the screen moves.
- The built-in camera fails while an external webcam works.
Laptop cameras can be affected by a damaged display cable because the camera is often mounted in the screen frame. Do not open a laptop unless you understand the risks and warranty terms. A repair shop or the manufacturer may be the safer choice.
For an older external webcam, replacement may cost less than repair. Choose a model with clear privacy controls, a reliable warranty, and support for your operating system.
A Simple Webcam Troubleshooting Order
Use this order when you need a fast, practical solution:
- Open the built-in camera app.
- Remove the privacy cover and check the camera key.
- Restart the computer.
- Close every other camera app.
- Test camera permissions.
- Select the correct camera in the app.
- Try another USB port or direct connection.
- Install system, app, and driver updates.
- Test the webcam on another computer.
- Contact support if the camera fails everywhere.
This order moves from the safest and easiest checks to the more advanced ones. It also prevents a common mistake: changing many settings at once. If you change one thing at a time, you will know which step fixed the problem.
In my troubleshooting experience, permissions and camera selection solve a large share of video-call issues. The next most common causes are privacy shutters, USB hubs, and apps that stay open in the background.
Webcam Safety and Privacy Tips
A working webcam should also be a safe webcam. Camera access is powerful, so treat it like a house key rather than a harmless switch.
Follow these habits:
- Allow camera access only to apps and websites you trust.
- Review camera permissions after major updates.
- Use a physical shutter when the camera is not needed.
- Keep your operating system and browser updated.
- Avoid installing unknown webcam utilities.
- Do not share remote access with untrusted people.
- Watch for the camera activity light.
- Remove meeting apps you no longer use.
A camera cover is useful, but never use a thick sticker that can press against or damage a laptop screen. A built-in shutter is usually safer. If you use tape, choose a thin cover designed for laptops.
Remember that a camera problem can sometimes be a privacy protection working as intended. A blocked webcam is frustrating during a meeting, but it is better than an unknown app gaining access without your knowledge.
Frequently Asked Questions About Why Is My Webcam Not Working
Why is my webcam not working in Zoom but working in the Camera app?
Zoom may be using the wrong camera or may not have permission to access it. Open Zoom’s video settings, select the correct webcam, and check your operating system’s camera permissions.
Why is my webcam showing a black screen?
A privacy shutter, blocked permission, wrong camera selection, or another app using the webcam can cause a black screen. Check those items first, then test the camera in a different app.
Why is my webcam not detected by my computer?
The camera may have a loose connection, bad USB port, missing driver, or hardware fault. Try another port, connect it directly, restart the computer, and test it on another device.
Why is my webcam blurry?
A dirty lens, low light, a weak camera sensor, or an incorrect focus setting can make video blurry. Clean the lens, improve lighting, and check whether the webcam has a manual focus ring.
Why does my webcam work in Windows but not in my browser?
Your browser may not have permission for that website, or the site may have selected the wrong camera. Open the browser’s site permissions, allow camera access, choose the correct device, and reload the page.
Can a webcam stop working after a Windows or macOS update?
Yes, an update can change permissions, drivers, or app settings. Restart the computer, review camera permissions, update the video app, and install any follow-up system updates.
How can I tell if my webcam is physically broken?
Test it with a different app and, if possible, another computer. If it fails everywhere and is not detected after connection and driver checks, the webcam or its cable may need repair or replacement.
Conclusion
The answer to why your webcam is not working is usually found in permissions, camera selection, privacy controls, drivers, or connections. Start with the simple checks, test the webcam in a separate app, and change one setting at a time.
If the camera works on another device, focus on your computer’s software and permissions. If it fails everywhere, inspect the cable and consider professional repair or replacement. Try these steps before your next call, and share this guide with anyone facing the same webcam problem.