Your camera looks pixelated mainly because of low resolution, digital zoom, poor lighting, compression, or a weak internet connection.
If you are asking, “Why does my camera look pixelated?” the answer can change based on whether you use a phone, webcam, DSLR, security camera, or video call app. This guide explains the common causes, simple tests, and practical fixes so you can get a sharper image without buying new equipment.

Why does my camera look pixelated?
A pixelated camera image has large, visible blocks instead of smooth detail. This happens when the image does not contain enough clear data for the size at which you view it.
Think of a photo as a mosaic. A high-quality image uses many tiny tiles. A low-quality image uses fewer, larger tiles. When you enlarge it, those tiles become easy to see.
The most common reasons include:
• The camera is set to a low resolution.
• You are using digital zoom or cropping too much.
• The image has been compressed by an app or website.
• The scene is too dark.
• A slow internet connection reduces video quality.
• The lens is dirty, foggy, or scratched.
• The camera is out of focus or moving.
• The screen or app is showing a low-quality preview.
The best fix depends on the source of the problem. Start by checking whether the image looks pixelated in the camera’s own app. If it looks clear there but poor in another app, the camera may be fine. The other app may be reducing the resolution.
Low resolution is a leading cause
Resolution describes how many pixels make up an image. A camera recording at 640 × 480 pixels has far less detail than one recording at 1920 × 1080 pixels.
When a small image fills a large screen, the device must stretch the pixels. This makes edges look blocky and faces look soft. This is one of the clearest answers to “Why does my camera look pixelated?”
Check these settings:
• Photo resolution
• Video resolution
• Frame size
• Quality mode
• Aspect ratio
• Front or rear camera selection
Some phones use a lower resolution for the front camera. Some webcams also default to 720p or lower, even when they support 1080p.
Set video to 1080p when your device, app, and internet connection can handle it. For photos, select the highest standard quality setting. Avoid unusual crop modes unless you need them.
Keep in mind that a higher resolution creates larger files. It may also use more storage, battery, and mobile data.
Digital zoom and heavy cropping reduce detail
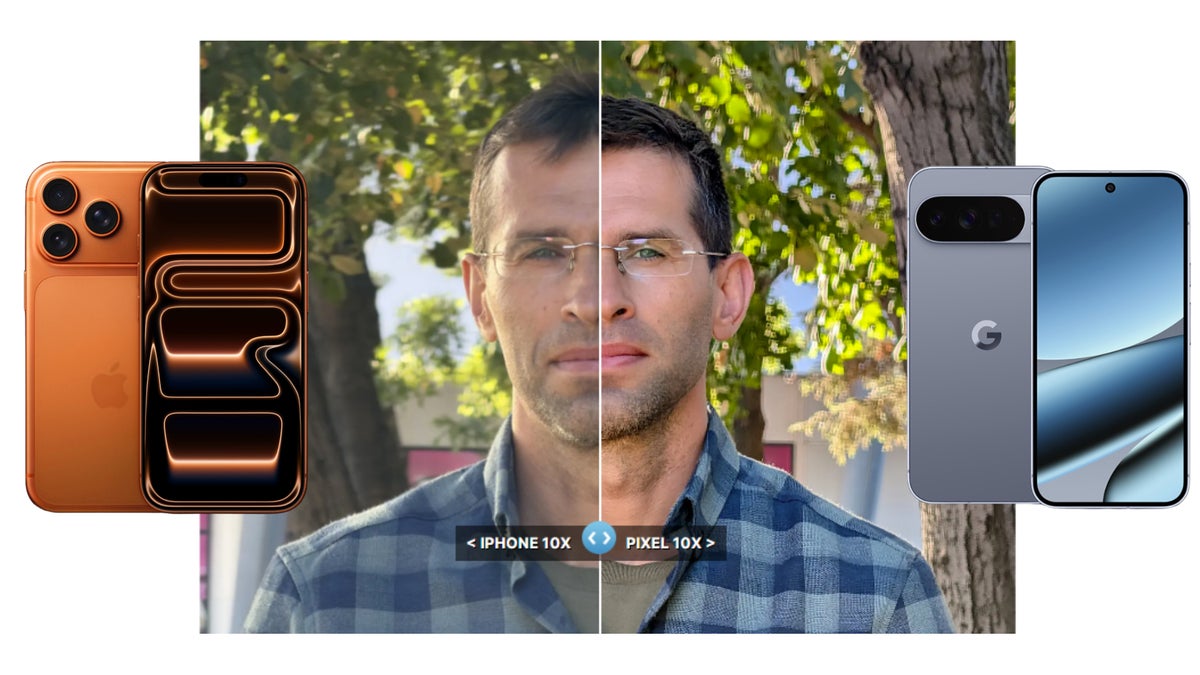
Digital zoom does not bring distant detail closer in the same way optical zoom does. It enlarges part of the image and removes the rest. The fewer pixels left after the crop, the more pixelated the image becomes.
For example, a 12-megapixel photo may look sharp at its full size. If you crop away 90% of the image, only a small amount of useful detail remains. Enlarging that small area makes the pixels visible.
To avoid this problem:
• Move closer to the subject when possible.
• Use optical zoom on a phone with a telephoto lens.
• Avoid maximum digital zoom.
• Keep the subject near the center if you plan to crop.
• Capture the image at the highest available resolution.
Digital zoom can be useful in bright light. However, it cannot restore detail that the sensor never captured.
Poor lighting makes images look rough
Low light affects image quality in two ways. First, the camera raises its ISO or signal gain to make the scene brighter. This adds grain and color noise. Second, the camera may reduce detail through noise reduction and compression.
The result can look pixelated, smeared, or watercolor-like. This often leads people to ask, “Why does my camera look pixelated?” when the real issue is not the pixel count but the lack of light.
Try these improvements:
• Face a window or soft lamp.
• Place the light in front of you, not behind you.
• Use more than one light for video calls.
• Turn on a camera’s night mode when suitable.
• Avoid strong backlighting.
• Keep the lens and subject still during exposure.
Good light gives the camera more information. It is often more effective than upgrading from one modern phone camera to another.
Compression can make a clear image look pixelated
Image and video compression reduces file size. Apps use compression to save storage, speed up uploads, and reduce data use. The trade-off is lost detail.
Compression becomes more visible when an image contains:
• Fast movement
• Fine hair or grass
• Dark shadows
• Confetti or tree leaves
• Water or smoke
• Rapid changes in color
Social media platforms often resize and compress uploaded photos and videos. Messaging apps may also send a smaller version unless you choose an original-quality option.
To preserve detail:
• Upload the original file when possible.
• Choose “HD,” “high quality,” or “original” sharing.
• Avoid saving and re-uploading the same image many times.
• Export video at a suitable bitrate.
• Keep the original file before editing.
A compressed image cannot be made fully sharp again with an editing app. Sharpening may improve edges, but it cannot replace missing detail.
Internet problems affect webcam and video call quality
If your camera looks pixelated during Zoom, Teams, FaceTime, Google Meet, or another video call, the internet connection may be responsible.
Many video platforms adjust quality automatically. When upload speed drops, the app may lower resolution or bitrate. Network congestion, Wi-Fi distance, background downloads, and VPN use can all affect the stream.
Look for these signs:
• The video becomes pixelated only during calls.
• The image clears up when you stop moving.
• The app displays a poor connection warning.
• Your local camera preview looks sharp.
• Other people say your video is blurry, but saved photos look fine.
Try the following steps:
-
Move closer to your Wi-Fi router.
-
Pause downloads and streaming on other devices.
-
Use a wired connection if possible.
-
Close apps that use the camera or network.
-
Restart the video call app.
-
Check the app’s camera quality settings.
-
Test the camera in a different app.
A fast download speed does not always mean a strong upload connection. Video calls rely heavily on upload speed and network stability.
A dirty lens can reduce clarity
A dirty lens usually causes blur, haze, glare, or soft contrast rather than true pixelation. Still, it can make a low-quality image look much worse.
Fingerprints, dust, makeup, skin oil, and moisture are common causes. A smudge can spread light across the frame and hide fine detail.
Clean the lens carefully:
• Use a clean microfiber lens cloth.
• Wipe in small, gentle circles.
• Remove dust before rubbing the glass.
• Do not use rough paper or clothing.
• Avoid spraying liquid directly on the camera.
If the camera lens has condensation inside it, let the device return to room temperature. Do not use strong heat, such as a hair dryer, because heat can damage seals and internal parts.
Focus, motion, and camera shake can look like pixelation
An image that is out of focus does not contain sharp edges. Motion blur creates a similar problem. When you enlarge either type of image, it may appear pixelated even though the main issue is blur.
Autofocus can struggle with:
• Low light
• Low contrast subjects
• Glass or reflective surfaces
• Objects too close to the lens
• Fast movement
• Busy backgrounds
Tap the subject on a phone to focus. On a dedicated camera, use a suitable autofocus mode and shutter speed. For video calls, sit at a steady distance from the camera and avoid placing your face too close to a wide-angle lens.
A tripod or stable surface can help. Better lighting also gives autofocus more contrast to work with.
The app may be using the wrong camera
Many devices have several cameras. A phone may include a front camera, main camera, ultra-wide camera, and telephoto camera. Some apps may select a lower-quality camera by default.
On a computer, the app may use a built-in webcam instead of an external 1080p webcam. This is another common reason people wonder, “Why does my camera look pixelated?”
Check the selected camera inside the app. Look for a camera menu in the video or privacy settings. If you use an external webcam, disconnect it and reconnect it, then select it manually.
Also check whether another program is using the camera. A camera may switch to a basic mode when several apps try to access it.
Your display may be making the image look worse
Sometimes the camera is not the problem. The screen may display a low-resolution preview, or the image may be enlarged beyond its natural size.
Test the image in three places:
• The camera’s built-in preview
• A saved file in the gallery or file manager
• A different screen or app
If the saved file looks sharp on another device, your original screen or viewing app may be scaling it poorly. Browser zoom, operating system display scaling, and low-quality previews can all affect how an image appears.
A damaged screen can also show unusual blocks, lines, or color patches. If every image looks pixelated, including images from other sources, inspect the display rather than the camera.
Camera hardware problems are less common
Hardware damage is possible, but it is not the first thing to assume. A damaged lens, sensor, autofocus motor, or internal connection may cause persistent image problems.
Hardware trouble is more likely when:
• Pixelation appears in every camera app.
• The issue affects both photos and videos.
• Cleaning and resetting settings do not help.
• One camera works while another does not.
• You see colored spots, lines, or fixed blocks.
• The device was dropped or exposed to water.
Compare the front and rear cameras. Take a photo in bright daylight without zoom. If one camera remains poor while the other is clear, the affected camera module may need service.
Do not open a phone or webcam unless you have the proper tools and repair experience. Internal camera parts are delicate, and opening the device may affect water resistance or warranty coverage.
How to fix a pixelated camera step by step
Use this short process before changing advanced settings.
-
Clean the lens with a microfiber cloth.
-
Move into bright, even light.
-
Turn off digital zoom.
-
Choose the highest practical resolution.
-
Hold the camera steady.
-
Tap the subject to focus.
-
Test the camera in its original app.
-
Test a second camera app.
-
Check the video call or social media quality settings.
-
Restart the device and update the app.
-
Test a saved photo on another screen.
-
Reset camera settings if the issue continues.
This process separates image capture problems from app, network, and display problems. It also prevents a common mistake: changing many settings at once and losing track of what helped.

Fixes for phones
Phone cameras often look pixelated because of digital zoom, low light, or app compression. Start with the rear main camera in bright daylight. This gives you a useful baseline.
Check the camera settings for resolution, scene optimization, HDR, and video quality. HDR can improve difficult lighting, but it may create movement artifacts if the subject moves quickly.
For sharper phone photos:
• Use the main camera instead of heavy zoom.
• Hold the phone with both hands.
• Clean the lens before important shots.
• Avoid photographing through a dirty case opening.
• Use night mode only when the phone is stable.
• Keep the original photo before editing or sharing.
Some phone apps use their own camera system instead of the phone’s full processing power. If a photo looks clear in the default camera app but poor in a social app, capture it first and upload the saved image.
Fixes for webcams and video calls
Webcams need both good lighting and enough bandwidth. Even a high-resolution webcam can look poor in a dark room or on a crowded Wi-Fi network.
Place a lamp or window in front of your face. Keep the camera near eye level. A clean background also helps some video platforms spend more data on your face instead of complex background details.
Review these settings:
• Camera selection
• Video resolution
• Frame rate
• Low-light compensation
• Background blur
• Automatic quality control
Background blur and virtual effects require extra processing. On older computers, they may reduce video quality or cause dropped frames. Turn them off for a quick test.
If the local preview is clear but the remote video is pixelated, focus on network upload speed and the video platform’s quality controls.
Fixes for security cameras
Security camera footage may look pixelated because of low bitrate, weak Wi-Fi, night vision, or excessive digital zoom. Wireless cameras can lower quality when the signal is weak.
Improve results by:
• Moving the camera closer to the router.
• Using a wired network where practical.
• Cleaning the protective cover.
• Adding steady outdoor lighting.
• Selecting a higher recording quality.
• Reducing unnecessary motion zones.
• Checking storage settings and recording bitrate.
Night footage can lose detail because the sensor receives less light. Infrared illumination helps, but it may still produce soft or noisy images. Make sure nearby objects do not reflect infrared light back into the lens.
Fixes for DSLR and mirrorless cameras
Dedicated cameras usually provide more control, but poor settings can still create a pixelated-looking image. Excessive cropping, high ISO, low-quality exports, and underexposure are common causes.
Use a suitable shutter speed to reduce motion blur. Keep ISO as low as practical while maintaining a bright exposure. Shoot in RAW when you plan to edit heavily, because RAW files preserve more sensor data than highly compressed JPEG files.
For video, bitrate matters as well as resolution. A 4K video recorded at a very low bitrate may show blocky artifacts during motion. Choose a balanced quality setting that matches your memory card, editing program, and storage space.
How resolution, bitrate, and megapixels work together
These terms are related, but they are not the same.
Resolution is the number of pixels in an image or video frame. More resolution can show more detail, but only when the lens, light, focus, and file quality support it.
Bitrate is the amount of data used for each second of video. A higher bitrate usually preserves more detail during movement, while a low bitrate can create blocky artifacts.
Megapixels describe the number of pixels captured by a photo sensor. More megapixels can help with cropping, but they do not guarantee a sharp photo. A smaller sensor with poor light may produce more noise than a lower-megapixel camera with better exposure.
This is why the answer to “Why does my camera look pixelated?” is rarely just “You need more megapixels.” The entire image chain matters.
Mistakes that make pixelation worse
A few habits can quickly reduce image quality.
• Zooming in before taking the photo and cropping again later.
• Sending images through several messaging apps.
• Taking photos in a dark room with the screen as the only light.
• Cleaning the lens with a rough shirt.
• Recording at high resolution with an extremely low bitrate.
• Judging quality from a small, compressed preview.
• Using a digital zoom setting without knowing it is active.
• Uploading a screenshot instead of the original file.
One lesson from practical camera troubleshooting is simple: test one variable at a time. First improve light. Then remove zoom. Then check resolution and focus. This makes the cause much easier to identify.
When should you replace the camera?
You may not need a new camera. Many pixelated images improve with better light, stable framing, correct settings, and a stronger connection.
Consider an upgrade when:
• The camera has very low native resolution.
• The lens or sensor is physically damaged.
• The device cannot meet your video call needs.
• You need reliable low-light performance.
• You regularly crop distant subjects.
• The camera lacks the controls your work requires.
Before buying, compare sensor size, lens quality, autofocus, low-light performance, video bitrate, and software support. Do not judge a camera by megapixels alone.

Frequently Asked Questions
Why does my camera look pixelated but my photos used to be clear?
A changed camera setting, app update, low-light scene, or damaged lens may be responsible. Test the camera in bright light and compare a saved photo with the live preview.
Why does my camera look pixelated on Zoom but clear in the camera app?
Zoom may be lowering video quality because of limited upload speed, network congestion, or automatic quality control. Check your connection, close other network-heavy apps, and review Zoom’s camera settings.
Can a dirty lens make my camera look pixelated?
A dirty lens more often causes haze, glare, or blur than true pixelation. However, it can make a low-resolution image look much worse, so clean the lens before testing other fixes.
Does digital zoom cause pixelation?
Yes. Digital zoom enlarges part of the image and reduces the amount of real detail available. Use optical zoom or move closer to the subject when possible.
Why does my webcam look pixelated in low light?
Low light forces the webcam to increase gain, which adds noise and reduces detail. Place a soft light in front of you and avoid relying on a bright screen as your only light source.
Can a slow internet connection make my camera pixelated?
Yes. Video call platforms may lower resolution and bitrate when upload speed or network stability is poor. A wired connection or stronger Wi-Fi signal can improve the stream.
Will increasing camera resolution always fix pixelation?
No. Higher resolution cannot fix poor focus, bad lighting, heavy compression, or a weak internet connection. Image quality depends on resolution, light, lens performance, focus, and data rate together.
Conclusion
The answer to “Why does my camera look pixelated?” usually involves low resolution, digital zoom, poor light, compression, focus problems, or network limits. Start with simple checks: clean the lens, improve the light, turn off digital zoom, select a suitable resolution, and test the image in another app.
These steps can often restore clear results without costly repairs or upgrades. Try the checklist today, then share your camera model and the app you use if you need more targeted troubleshooting advice.