A dirty lens, poor lighting, software settings, or a damaged camera can make your laptop camera blurry.
If you are asking, “why is my laptop camera blurry,” the answer is often simple to fix. Dust, fingerprints, weak light, a privacy cover, low video quality, or an app setting can soften the image. This guide explains how to find the real cause, test your camera, and restore a clear picture without buying a new laptop.
Why Is My Laptop Camera Blurry?
A laptop camera is a small sensor with a tiny lens. It needs clean glass, enough light, and the right software settings to produce a sharp image. When one of these parts fails, your face may look hazy, soft, grainy, or out of focus.
The most common reasons include:
• A smudged camera lens
• A camera privacy slider or cover
• Poor room lighting
• A low-quality built-in webcam
• Incorrect video settings in Zoom, Teams, or another app
• An outdated camera driver
• A slow internet connection
• A loose or damaged camera module
• Moisture or scratches on the lens
The first step is to learn whether the problem is physical or digital. If the image looks blurry in every app, the lens, camera hardware, or system settings may be responsible. If it looks clear in one app but blurry in another, the app settings are more likely at fault.

Clean the Laptop Camera Lens
A dirty lens is the most common answer to “why is my laptop camera blurry.” Laptop screens collect dust, skin oil, and fingerprints. Each time you open or close the lid, particles can settle over the small camera lens.
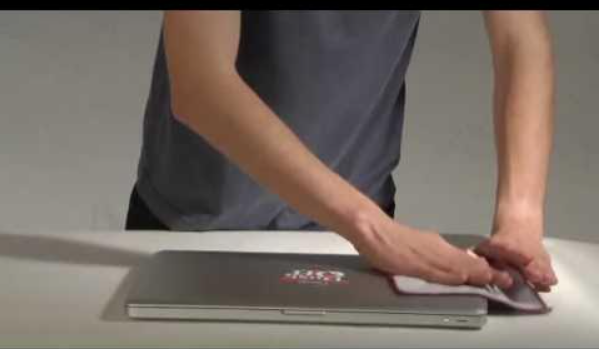
Turn off the camera app before cleaning it. Use a clean microfiber cloth and gently wipe the lens in small circles. Do not press hard, and do not spray cleaner directly onto the screen or camera.
For stubborn marks, lightly dampen one corner of the cloth with distilled water. The cloth should feel almost dry. Avoid paper towels, tissues, rough fabric, and household glass cleaner because they may leave fibers or damage nearby screen coatings.
After cleaning, open the built-in Camera app on Windows or Photo Booth on macOS. Check the image before changing other settings. A simple wipe often fixes a blurry laptop camera within seconds.
Check for a Privacy Cover or Camera Slider
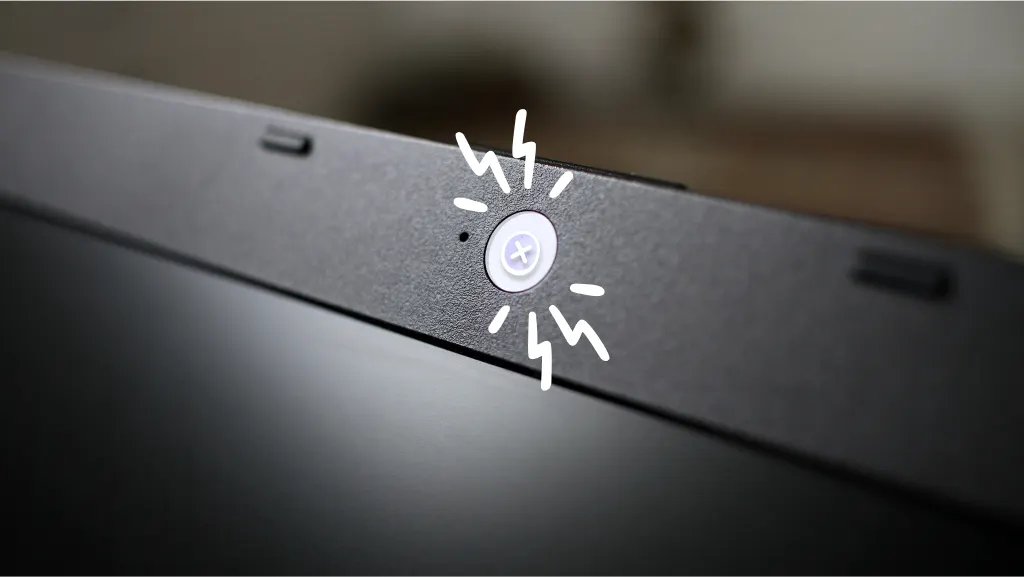
Many laptops now include a physical privacy shutter. Some users place a sticker, tape, or sliding cover over the camera for privacy. If the cover is partly closed, the camera may show a gray, dark, or cloudy image.
Look closely at the camera area above your screen. Make sure the shutter is fully open and that no adhesive film covers the lens. Some privacy covers are thicker than expected and can block part of the camera even when they appear open.
A privacy cover is useful when you are not using the camera. However, it must sit flat and leave the lens completely clear during a video call. Remove any temporary tape or thick cover and test the camera again.
Improve the Lighting in Your Room
Poor lighting can make a sharp camera look blurry. In a dark room, the camera often increases exposure. This can create digital noise, soft details, and motion blur.
Place a lamp or window in front of you, not behind you. A bright window behind your head can turn your face into a dark silhouette. Soft light from the front gives the camera more detail to work with.
Try these simple lighting changes:
• Face a window during the day
• Place a desk lamp behind your screen
• Avoid strong light directly above your head
• Turn off bright lights behind you
• Use two soft lights if one side of your face looks dark
• Keep the background slightly less bright than your face
Lighting cannot repair a scratched lens or broken camera. Still, it can greatly improve a grainy or soft image. In my own video calls, moving a small lamp from behind my chair to the side of my monitor made a bigger difference than changing several camera settings.
Adjust Video Quality in Your App
Your laptop camera may be clear in the system Camera app but blurry in Zoom, Microsoft Teams, Google Meet, Skype, or another service. Video apps often reduce quality to save bandwidth or keep calls stable.
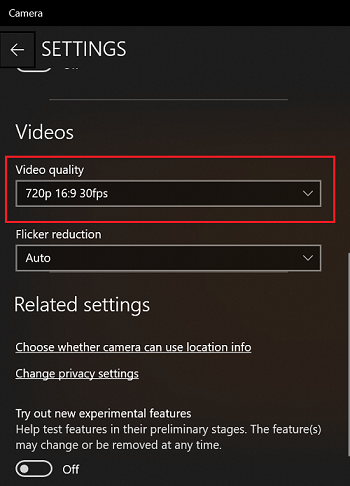
Open the video settings in the app you use. Look for options such as camera resolution, HD video, original quality, or low-light adjustment. Turn on HD when your internet connection and computer can support it.
Also check that the app is using the correct camera. Some laptops have more than one camera, and an external webcam may provide a sharper image than the built-in camera.
If the image becomes blurry during calls but looks clear before the call starts, your internet connection may be the issue. A slow upload speed can cause a service to reduce video quality. Pause large downloads, move closer to your Wi-Fi router, or connect with an Ethernet cable if possible.

Check Windows or macOS Camera Settings
Operating system settings can affect camera quality. Windows and macOS may limit camera access, choose the wrong device, or apply settings that make troubleshooting harder.
On Windows, open the Camera app and test the image. Then check camera access under Settings, Privacy & security, and Camera. Make sure camera access is enabled for the device and the app you want to use.
On a Mac, open Photo Booth or FaceTime. Check that the correct camera is selected in the app. If another program is using the camera, close it and test again.
You can also restart the laptop. This sounds basic, but it clears temporary camera errors and releases the device from apps running in the background. I have seen video calls stay soft simply because a meeting app kept an old camera connection after the laptop woke from sleep.
Update or Reinstall the Camera Driver
A camera driver helps the operating system communicate with the webcam. If the driver is outdated, damaged, or incompatible, the camera may produce a poor image or fail to work correctly.
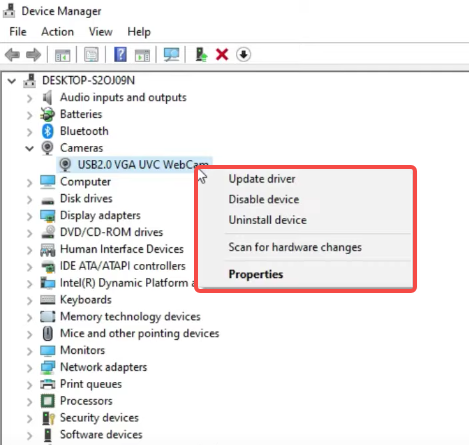
Windows users can open Device Manager and expand the Cameras or Imaging devices category. Right-click the camera and choose the option to search for driver updates. You can also visit the laptop maker’s official support page and install the recommended camera, chipset, and system updates.
Avoid random driver websites. They may provide unsafe files or the wrong driver. Use the manufacturer’s support page or the update tools built into your operating system.
If updating does not help, uninstalling the camera device and restarting the laptop may allow Windows to reinstall it. Follow the manufacturer’s instructions before removing any driver, especially on a work computer.
Mac camera drivers are usually managed through macOS updates rather than separate downloads. Install available system updates from the official Software Update menu, then restart the Mac.
Test Whether the Camera Is Blurry Everywhere
A simple test can show whether the problem comes from the camera or from one app.
Follow these steps:
- Close Zoom, Teams, Meet, and other apps that may use the camera.
- Open the built-in Camera app on Windows or Photo Booth on macOS.
- Check the image in good front lighting.
- Move your face slightly closer and farther from the screen.
- Test the camera in a browser-based meeting tool if needed.
- Compare the result with an external webcam or phone camera.
If the image is blurry in every test, inspect the lens and camera hardware. If only one app looks blurry, check that app’s resolution, camera selection, and bandwidth settings.
Also look for a focus problem. Most built-in laptop cameras have fixed focus, so they cannot focus on very close objects. A document held right against the lens may look soft even when your face looks clear.
Understand the Limits of a Built-In Laptop Webcam
Many built-in laptop cameras are designed for basic calls, not studio-quality video. Older models may use a 720p sensor, while newer premium laptops often offer 1080p or better cameras.
A small sensor struggles in low light. It may also create a smooth, waxy image when the software reduces noise. This can look blurry even when the lens is clean.
You may be seeing the normal limit of the hardware if:
• The camera is clear in bright light but soft in normal light
• The image has low detail in every app
• The laptop is several years old
• The camera has a low resolution
• An external webcam looks much sharper on the same computer
Before buying anything, improve the light and clean the lens. If the built-in camera still looks poor, a good USB webcam may offer better focus, color, and detail. An external webcam is often the most practical upgrade for frequent meetings, online teaching, streaming, or content creation.

Check for Hardware Damage
Physical damage is less common, but it can explain why your laptop camera stays blurry after cleaning and software checks.
Inspect the lens for scratches, cracks, cloudiness, or moisture. If the laptop was dropped, squeezed in a bag, or exposed to liquid, the camera module may have moved or suffered damage. A blurry image that began immediately after an impact deserves extra attention.
Do not open the screen bezel unless you have repair experience. Modern laptop displays contain delicate cables, and the bezel can break easily. Contact the laptop maker, a trusted repair shop, or your workplace support team.
A repair may not be worthwhile on an older budget laptop. Compare the cost of a camera repair with the price of a reliable USB webcam. Be careful with any service that promises a guaranteed fix without testing the camera first.
Prevent Your Laptop Camera From Becoming Blurry
Once you fix the problem, a few habits can keep the picture clear.
• Wipe the lens once a week if you use video calls often
• Store the laptop in a clean sleeve
• Keep food, drinks, and makeup away from the screen
• Use a thin privacy shutter made for your laptop
• Keep the camera away from steam and high humidity
• Install operating system updates regularly
• Test the camera before an important meeting
• Use front lighting instead of a bright light behind you
Do not touch the lens with your fingers. Even a thin layer of oil can scatter light and make the image look foggy. Also, avoid closing the laptop with a thick camera cover attached. It may place pressure on the display and damage the screen over time.
My best practical habit is to join an important call five minutes early. A quick test gives you time to clean the lens, adjust the light, or switch to a backup webcam without stress.
Troubleshooting Checklist
Use this checklist when you need a fast answer to “why is my laptop camera blurry.”
- Wipe the lens with a microfiber cloth.
- Open the privacy shutter fully.
- Remove tape, stickers, or protective film.
- Move a lamp or window in front of your face.
- Test the camera in the built-in Camera app.
- Check the video quality settings in your meeting app.
- Confirm that the correct camera is selected.
- Restart the laptop.
- Install official operating system and camera updates.
- Test with another app or external webcam.
- Inspect the lens for scratches or moisture.
- Seek repair help if the image remains blurry everywhere.
This order saves time because it starts with easy, low-risk fixes. There is no reason to reinstall drivers before checking whether a privacy cover is still blocking the lens.
When Should You Replace the Webcam?
You may want an external webcam when the built-in camera is consistently low quality and the hardware cannot meet your needs. This is common with older laptops, entry-level models, and devices with poor low-light performance.
Choose a webcam with at least 1080p resolution, automatic exposure, a useful field of view, and a reliable mounting clip. Autofocus can help if you often show documents or objects close to the camera. A built-in microphone is convenient, but it should not be the main reason you choose a webcam.
A new webcam will not fix a bad internet connection or poor room lighting. Treat it as one part of the setup. Clean glass, steady light, a good connection, and suitable app settings still matter.
Frequently Asked Questions About Why Is My Laptop Camera Blurry
Why is my laptop camera blurry but the lens is clean?
The cause may be poor lighting, low video resolution, app settings, or an outdated camera driver. Test the camera in the built-in Camera app to see whether the problem affects the whole system or only one program.
How do I make my laptop camera clearer?
Clean the lens, face a soft light source, open any privacy shutter, and enable HD video in your meeting app. If the image remains soft in every app, the built-in webcam may have limited hardware quality.
Why is my laptop camera blurry on Zoom but clear elsewhere?
Zoom may be using low video quality, the wrong camera, or a bandwidth-saving setting. Open Zoom’s video settings, select the correct camera, enable HD if available, and check your internet connection.
Can a laptop camera become blurry because of a software update?
Yes, an update can change camera permissions, drivers, or app settings. Restart the laptop, check camera permissions, and install the latest official driver or system update if the problem started after an update.
Why is my laptop camera blurry in low light?
A small webcam sensor needs enough light to capture detail. In a dark room, it may increase exposure and noise reduction, which can create a soft or grainy image.
Should I repair my laptop camera or buy an external webcam?
An external webcam is often the cheaper and faster choice when the built-in camera has physical damage or poor image quality. Repair may make sense if the laptop is new, under warranty, or has other camera-related features you need.
Conclusion
The answer to “why is my laptop camera blurry” is usually a dirty lens, blocked shutter, weak lighting, low app quality, or a software issue. Start with the simple steps: clean the lens, improve front lighting, test another app, and check your camera settings.
If the camera stays blurry everywhere, the hardware may be limited or damaged. Try an external webcam before paying for a repair, and test your setup before important calls. Use these steps today, then share your result or explore more laptop troubleshooting guides for practical fixes.