Your laptop camera may not be detected because of disabled permissions, outdated drivers, hardware switches, or a faulty camera.
When you ask, “why is my laptop camera not being detected?” the cause is often simple to fix. Windows and macOS can block camera access for privacy, while updates, damaged drivers, loose hardware, or another app may also stop the camera from working. This guide explains the likely causes and shows safe steps to restore your webcam.
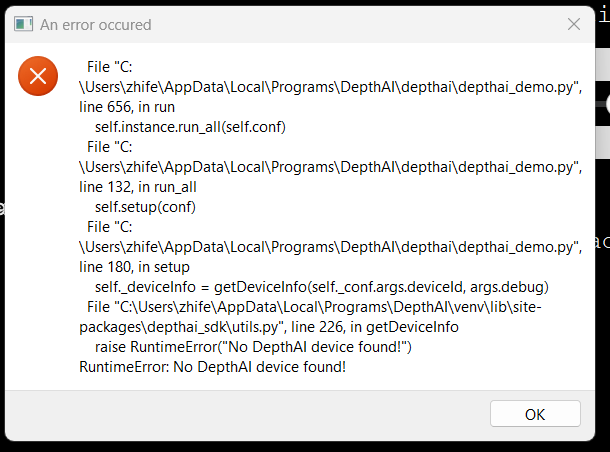
Why is my laptop camera not being detected?
A laptop camera is detected when the operating system can communicate with the webcam and load its software. If the camera does not appear in apps, Device Manager, System Information, or system settings, your laptop may have a driver, privacy, hardware, or firmware issue.
The most common reasons include:
• Camera access is turned off in privacy settings
• A physical camera shutter is closed
• A keyboard camera key has disabled the webcam
• The camera driver is missing or damaged
• Another app is already using the camera
• A recent update caused a software conflict
• Antivirus software is blocking access
• The built-in camera has a hardware fault
In many cases, the camera itself is fine. Think of the webcam as a small room with three doors: the hardware door, the driver door, and the privacy door. If any door is closed, your video app cannot enter.

Check the simple causes first
Before changing drivers or resetting your system, check the easy issues. These quick checks often solve the problem in a few minutes.
Look for a physical camera cover
Many laptops now include a small privacy slider above the screen. It may cover the lens and sometimes disable the camera at the same time.
Move the slider until the lens is visible. If you see a red or orange mark, the shutter may still be closed.
Check the camera function key
Some laptops have a camera icon on one of the function keys. Press that key once, or press it with the Fn key.
Look for a key showing:
• A camera symbol
• A crossed-out camera
• A webcam symbol with a lock
Wait a few seconds after pressing it, then open your video app again.
Restart the laptop
A restart can clear a stuck camera process. This is especially useful after a Windows update, a driver install, or a video meeting that ended unexpectedly.
Do not only close the laptop lid. Choose Restart from the operating system menu. A full restart reloads the camera service and related drivers.
Test a second camera app
Try the built-in Camera app, a web browser, or a video meeting app. If the camera works in one app but not another, the problem is likely linked to app settings rather than the webcam.

Check camera privacy permissions in Windows
Windows includes privacy controls that can block the camera even when the hardware works. This is one of the most common answers to “why is my laptop camera not being detected?”
Windows 11 steps
1. Open Settings.
2. Select Privacy & security.
3. Choose Camera.
4. Turn on Camera access.
5. Turn on Let apps access your camera.
6. Turn on Let desktop apps access your camera.
Desktop apps include browsers, Zoom, Microsoft Teams, Discord, and similar programs. If desktop access is off, many video apps cannot use the webcam.
Windows 10 steps
- Open Settings.
- Select Privacy.
- Choose Camera.
- Turn on Allow access to the camera on this device.
- Turn on Allow apps to access your camera.
- Enable access for the app you want to use.
After changing these settings, close and reopen the video app. Some programs check camera permission only when they start.
Check the app’s camera choice
A laptop may have more than one camera. For example, it may show an internal webcam and an external USB camera.
Open the video app’s settings and select the correct camera. In Teams, Zoom, Google Meet, and similar tools, this option is usually under Video or Devices.

Fix a laptop camera that is missing in Windows Device Manager
Device Manager can show whether Windows sees the camera at all. It can also reveal driver errors.
Find the camera
- Right-click the Start button.
- Select Device Manager.
- Expand Cameras.
- Look for Integrated Camera, HD Webcam, or a similar name.
The camera may also appear under Imaging devices or Sound, video and game controllers.
Look for warning signs
A yellow warning icon can mean the driver has a problem. A small down arrow may mean the camera is disabled.
Right-click the camera and check these options:
• Enable device, if shown
• Update driver
• Uninstall device
• Properties for error codes and device status
If the camera is disabled, choose Enable device. Then restart the laptop and test it again.
Update the driver
Choose Update driver, then select Search automatically for drivers. Windows may find a suitable driver through Windows Update.
For the most reliable result, check your laptop maker’s support page. Download the camera driver made for your exact model and version of Windows. Avoid random driver websites, because they may provide unsafe or incorrect files.
Reinstall the driver
If updating does not help, right-click the camera and choose Uninstall device. If Windows asks whether to remove the driver, follow the instructions carefully. Then restart the laptop.
Windows often reinstalls the webcam driver during startup. If it does not, install the official driver from the laptop maker.

Check camera permissions and settings on a Mac
macOS also uses privacy controls to protect the camera. If you are wondering “why is my laptop camera not being detected?” on a Mac, permissions should be one of your first checks.
Allow camera access
- Open the Apple menu.
- Select System Settings.
- Choose Privacy & Security.
- Select Camera.
- Turn on access for the app you want to use.
On older macOS versions, the path may be System Preferences, Security & Privacy, and Camera.
Close and reopen the app after changing permission. macOS may not apply the new setting to an app that was already running.
Check Screen Time restrictions
Screen Time can restrict camera use. Open System Settings, select Screen Time, and review Content & Privacy settings.
Make sure camera access is allowed. This check is useful on family computers or school-managed Macs.
Test the camera in another app
Open FaceTime or Photo Booth. If the camera works there, the problem may be limited to your browser or meeting app.
If it fails everywhere, continue with a restart, system update, and hardware check.
Close apps that may already be using the webcam
Most laptop cameras can serve only one app at a time. If Zoom has control of the camera, your browser may show a black screen or report that no camera exists.
Close apps that commonly use a webcam:
• Zoom
• Microsoft Teams
• Google Meet in a browser
• Skype
• Discord
• FaceTime
• Camera
• OBS Studio
• Social media apps
On Windows, open Task Manager with Ctrl + Shift + Esc. Select a video app and choose End task if it remains open.
On macOS, press Option + Command + Esc. Select the app and choose Force Quit if it will not close normally.
Then restart the app you want to use. If the camera still fails, restart the laptop to clear background camera services.
Fix browser camera problems
A camera may work in the operating system but fail in Google Meet, a web classroom, or another browser service. Browser permissions are separate from Windows or macOS permissions.
Allow camera access in Chrome
- Open Chrome.
- Select the three-dot menu.
- Choose Settings.
- Select Privacy and security.
- Choose Site settings.
- Select Camera.
- Allow the website and choose the correct camera.
You can also select the camera icon near the address bar while visiting a website. Set camera access to Allow, then reload the page.
Allow camera access in Edge
Open Settings, select Cookies and site permissions, then choose Camera. Allow camera access and check that the correct device is selected.
Allow camera access in Safari
Open Safari settings, select Websites, and choose Camera. Set the relevant website to Allow or Ask.
A browser may remember an old decision. If you once selected Block, the website may continue to fail until you change that permission.
Install system updates and laptop manufacturer updates
Operating system updates can fix camera bugs, improve security, and add support for newer hardware. They can also cause short-term conflicts, so check for additional updates after a major system change.
On Windows:
- Open Settings.
- Select Windows Update.
- Choose Check for updates.
- Install available updates.
- Restart the laptop.
On macOS:
- Open the Apple menu.
- Select System Settings.
- Choose General.
- Select Software Update.
- Install available updates.
Also visit the laptop maker’s official support page. Look for updates for the chipset, camera, BIOS, firmware, and system utilities. Install only files that match your exact model.
A BIOS update can help with hardware detection, but it should be treated with care. Keep the charger connected, do not interrupt the process, and follow the manufacturer’s instructions.
Check antivirus and security software
Security tools can block camera access to protect your privacy. This feature is useful, but it can create confusion when a trusted video app suddenly stops working.
Open your antivirus or security software and look for settings such as:
• Webcam protection
• Camera privacy
• Block camera access
• Application control
• Privacy shield
Allow access for the app you trust. Do not disable all security features for a long period. If you test by turning off webcam protection, turn it back on immediately afterward.
Work or school laptops may also use organization policies. In that case, you may not be able to change the setting yourself. Contact the administrator instead of trying to bypass the policy.
Check whether the camera is disabled in BIOS or UEFI
Some laptops allow the built-in camera to be disabled in BIOS or UEFI firmware. This setting sits below Windows or macOS, so the operating system cannot detect the camera while it is turned off there.
To check it:
- Shut down the laptop.
- Turn it on and press the setup key shown on the screen.
- Look for menus such as Security, Advanced, or Devices.
- Find an option called Camera, Webcam, or Integrated Camera.
- Set it to Enabled.
- Save changes and restart.
The setup key differs by brand. It may be F2, Delete, F10, or Esc. Do not change unrelated firmware settings, because incorrect changes can affect startup or hardware behavior.
When the camera may have a hardware problem
Software fixes cannot repair a damaged webcam. If the camera is missing from Device Manager on Windows or does not appear in system information on macOS, hardware trouble becomes more likely.
Possible hardware causes include:
• A damaged camera module
• A loose internal cable
• Liquid or impact damage
• A failed motherboard connection
• A defective privacy switch
• Damage after a screen replacement
A useful test is an external USB webcam. If the USB camera works but the internal camera does not appear anywhere, the built-in webcam may need repair.
Do not open the laptop unless you have the right tools and experience. Laptop screens and camera cables are delicate. Opening the case may also affect warranty coverage.
Contact the manufacturer or a qualified repair shop if:
• The camera is missing after all software checks
• The laptop suffered a drop or liquid spill
• The camera fails in every app and operating system
• The lens or screen assembly is damaged
• The device shows a hardware error code
What not to do when fixing a laptop camera
A few rushed fixes can create bigger problems. Use a careful process and change one setting at a time.
Avoid these mistakes:
• Installing drivers from unknown websites
• Removing several system devices at once
• Changing random BIOS settings
• Disabling antivirus protection permanently
• Opening the laptop without checking warranty terms
• Using registry cleaners that claim to repair drivers
• Resetting the entire operating system too early
I have seen people spend hours reinstalling Windows when the real issue was a closed camera shutter or a disabled privacy setting. Start with simple checks, then move toward drivers, updates, firmware, and hardware.
Write down each change you make. This small habit makes troubleshooting easier and helps a technician understand what has already been tested.
A practical troubleshooting order
Use this order when you need a fast and safe solution to “why is my laptop camera not being detected?”
- Open the camera shutter.
- Check the camera function key.
- Restart the laptop.
- Test the camera in another app.
- Review Windows or macOS camera permissions.
- Close other video apps.
- Check browser permissions.
- Inspect Device Manager or Mac system information.
- Update the operating system and official drivers.
- Review antivirus and BIOS settings.
- Test an external USB webcam.
- Contact support if the internal camera remains missing.
This order starts with low-risk fixes. It also helps you identify the problem’s layer. If the camera works in one app, focus on app permissions. If it is missing from the operating system, focus on drivers, firmware, or hardware.
Frequently Asked Questions About Why Is My Laptop Camera Not Being Detected?
Why is my laptop camera not being detected in Zoom?
Zoom may not have camera permission, or another app may already be using the webcam. Check Zoom’s video settings, select the correct camera, close other video apps, and review your operating system’s camera permissions.
Why is my laptop camera not being detected after a Windows update?
A Windows update may have changed privacy settings or replaced the camera driver. Check camera permissions, Device Manager, Windows Update, and your laptop maker’s official driver page.
Why is my laptop camera not being detected even though the light turns on?
The light may show that an app is trying to access the camera, but it does not prove that video is reaching the app. Check app permissions, select the correct camera, close conflicting programs, and test another camera app.
Can a laptop camera be disabled with a keyboard key?
Yes. Many laptops include a function key that disables the webcam for privacy. Press the key with the camera icon, sometimes together with Fn, and then test the camera again.
How do I know if my laptop camera is broken?
If the camera is missing from system settings and Device Manager, fails in every app, and does not return after official driver and firmware checks, hardware failure is possible. An external USB webcam can help confirm the problem.
Will reinstalling Windows fix a laptop camera that is not detected?
It may fix a damaged software setup, but it is not the best first step. Check permissions, drivers, updates, firmware, and hardware before performing a full reset, because a reset will not repair a broken camera module.
Conclusion
The answer to “why is my laptop camera not being detected?” usually involves privacy settings, a disabled camera key, a driver issue, an app conflict, or hardware trouble. Start with the lens cover, permissions, restart, and app settings before moving to drivers, firmware, or repair.
Use the troubleshooting order in this guide and make one change at a time. If the camera remains missing everywhere, test an external webcam and contact the laptop maker or a trusted repair professional. Share your camera model and the fix that worked for you in the comments.