Your webcam lags when slow internet, high CPU use, outdated drivers, or camera settings delay video processing.
If you are asking, “why is my webcam lagging,” you are not alone. A frozen, delayed, or choppy camera can ruin a video call, online class, livestream, or work meeting. The good news is that webcam lag usually has a clear cause, and you can often fix it without buying a new camera.
What webcam lag looks like
Webcam lag happens when your camera video reaches the screen later than it should. You may notice a delay between moving your head and seeing that movement, or your video may freeze for a few seconds.
Common signs include:
• Choppy or jumpy video
• A frozen image
• A black screen that appears and disappears
• Audio and video falling out of sync
• A delayed picture during Zoom, Teams, Meet, or Skype calls
• A camera preview that looks smooth but appears laggy to other people
Webcam lag is not always caused by the webcam itself. Your computer, internet connection, video app, USB port, camera driver, and lighting can all affect performance.
Think of the webcam system as a relay race. The camera captures the image, your computer processes it, your app compresses it, and your network sends it. If one runner slows down, the whole video appears late.

Why is my webcam lagging?
The most common reasons include limited system resources, weak internet, USB problems, high video settings, and software conflicts. Finding the exact cause is easier when you check one part of the system at a time.
Here are the main causes of webcam lag.
Your computer is using too many resources
Video calls use the camera, microphone, processor, memory, and network at the same time. If many apps are open, your computer may struggle to process the video smoothly.
This often happens when you run a video call while using a browser with many tabs, a game, a video editor, or a screen recording tool. Older laptops may show this problem sooner than newer computers.
Open Task Manager on Windows or Activity Monitor on macOS. Look for unusually high CPU, memory, or GPU use. Closing unnecessary apps may fix webcam lag within seconds.
Your internet connection is unstable
A webcam does not need extremely fast internet, but it does need a stable connection. Upload speed matters because your device sends camera video to the meeting service.
Wi-Fi congestion, weak signal strength, network switching, and packet loss can cause delays. A speed test may show good download speed while your upload connection remains poor.
If your webcam works well in the local camera app but lags during a call, your internet connection or video meeting service may be the problem.
Your webcam resolution or frame rate is too high
High-definition video looks sharp, but it requires more processing power and upload bandwidth. A 1080p camera running at 30 or 60 frames per second can place a heavy load on a small laptop.
Try lowering the camera resolution to 720p. If your app offers a frame rate setting, choose 30 frames per second instead of 60. The picture may look slightly less detailed, but the video often becomes much smoother.
Your camera driver is outdated
A driver helps your operating system communicate with the webcam. An old, damaged, or incompatible driver can cause lag, freezing, flickering, or camera failure.
Windows often installs driver updates automatically, but this does not guarantee that the best driver is installed. Check Windows Update and the webcam maker’s support page for current software.
On macOS, camera support is usually built into the operating system. Updating macOS and the camera app may resolve compatibility problems.
Another app is using the webcam
Most webcams work best with one main app at a time. If Zoom, Teams, a browser tab, OBS, or a camera utility is using the camera in the background, another app may receive delayed video.
Close all apps that may access the camera. Then restart the app you want to use. A full computer restart can also clear a camera process that is stuck in the background.
Your USB connection is weak
External webcams can lag when connected through a damaged cable, an overloaded hub, or a low-quality adapter. USB devices also share bandwidth with other connected hardware.
Plug the webcam directly into your computer instead of a hub. Try another USB port, preferably a high-speed port. If the cable is removable, test a different compatible cable.
Poor lighting is making the video look worse
Low light can create noisy, blurry, or slow-looking video. Many webcams reduce their shutter speed in dark rooms. This can make movement appear smeared or delayed.
Place a soft light in front of your face. Avoid putting a bright window behind you. Better lighting allows the webcam to use a faster shutter speed and produce a clearer picture.
The video meeting app is limiting quality
Some meeting apps lower video quality when they detect a weak connection or high system load. This can look like webcam lag, even when the camera itself works correctly.
Check the app’s camera settings and turn off unnecessary effects. Background blur, virtual backgrounds, face filters, and automatic framing can use extra CPU or GPU power.

How to fix webcam lag step by step
Use these steps in order. Test the camera after each major change so you can identify what solved the problem.
1. Restart your computer
A restart closes hidden processes, clears temporary errors, and reloads camera services. It is simple, but it fixes many short-term webcam problems.
Restart the computer instead of only closing the video app. Then open the camera preview and test the image before joining a meeting.
2. Close apps running in the background
Close games, editors, browsers with many tabs, cloud sync tools, and screen recorders. Also check whether another video call app is still open.
On Windows, press Ctrl, Alt, and Delete, then open Task Manager. On macOS, use Activity Monitor to find apps consuming large amounts of CPU or memory.
3. Test the camera in a basic app
Use the built-in Camera app on Windows or Photo Booth on macOS. This test helps separate a camera problem from a video meeting problem.
If the camera is smooth there, the issue may involve Zoom, Teams, Meet, browser permissions, or your network. If it lags in every app, inspect the USB connection, driver, lighting, and computer performance.
4. Lower the video quality
Open your meeting app’s camera settings. Select 720p if available, and turn off 60 frames per second.
You can also disable high-quality video, studio effects, portrait blur, and virtual backgrounds. These features are useful, but they are not essential for a stable call.
5. Improve your lighting
Use a lamp or window in front of you. Keep the light near eye level and avoid harsh light directly above your head.
A simple desk lamp can make a bigger difference than many people expect. Good lighting helps the camera capture each frame faster and with less image noise.
6. Improve your Wi-Fi connection
Move closer to your router or connect to the 5 GHz Wi-Fi band if your router supports it. A wired Ethernet connection is usually more stable for important meetings.
Pause large downloads, cloud backups, game updates, and streaming on other devices. Ask other users on the network to avoid heavy uploads during your call.
7. Update the webcam and system software
Install operating system updates, video app updates, and webcam driver updates. Only download drivers from the computer or webcam manufacturer’s official support page.
Avoid random driver websites. They may provide incorrect software or unwanted programs.
8. Change USB ports
Disconnect the webcam and plug it directly into another port. Avoid using a low-cost hub while testing.
If the camera works on one port but not another, the problem may be the port, hub, adapter, or power supply rather than the webcam.
9. Check camera permissions
Your operating system may limit camera access. On Windows, open Settings, choose Privacy and security, and review Camera permissions. On macOS, open System Settings, select Privacy and Security, and check Camera access.
Make sure your video app and browser are allowed to use the camera. After changing permissions, restart the app.
10. Reinstall the camera device
If the webcam still lags, remove it from Device Manager on Windows and restart the computer. Windows should detect it again and reinstall the basic driver.
On macOS, updating the system is usually the main repair step. If an external webcam still fails, test it on another computer to check whether the hardware is defective.

How to tell whether the problem is your webcam or your internet
A simple test can save you time. Open the camera in an offline app, such as the built-in camera preview, and watch the video for one minute.
If the preview is smooth, but the video lags during online calls, check these areas:
• Upload speed
• Wi-Fi strength
• Video meeting settings
• Browser performance
• VPN use
• Background downloads
If the preview lags even when you are offline, focus on the webcam, USB port, driver, lighting, and computer resources.
You can also ask another person what they see. If your local preview looks smooth but they see frozen video, the issue is likely related to encoding or network upload. If both views are choppy, the camera or computer may be struggling before the video leaves your device.
Webcam lag on Windows
Windows users can check several common settings. First, open the Camera app and test the webcam outside your meeting software.
Then review these items:
• Update Windows through Settings
• Check the webcam in Device Manager
• Close duplicate camera apps
• Turn off unnecessary camera effects
• Test another USB port
• Allow camera access for desktop apps
Windows may also apply power-saving settings to USB devices. On some systems, disabling USB selective suspend can help prevent disconnects or delayed camera response. Change this setting only if basic steps do not work, since power-saving features can help laptop battery life.
If a driver update caused the problem, rolling back to the previous driver may help. This option appears in the webcam device properties when Windows has retained an earlier driver.
Webcam lag on Mac
Mac users should begin with a restart and a camera test in Photo Booth. If the camera works there, the issue may be within the meeting app or browser.
Check the following:
• Update macOS
• Update the video meeting app
• Review camera permissions
• Close apps that may use the camera
• Disconnect unnecessary USB devices
• Test the webcam with another app
Some Mac models use significant processing power for background effects, portrait blur, and studio lighting. Turning off these tools can reduce delay.
If you use an external webcam, connect it directly to the Mac when possible. USB adapters and docks can sometimes cause compatibility or bandwidth problems.
Webcam lag during Zoom, Teams, or Google Meet
Video platforms manage camera quality based on system performance and network conditions. A meeting may become laggy even when your webcam is working normally.
Try these app-specific solutions:
-
Turn off virtual backgrounds and video filters.
-
Lower the camera resolution.
-
Close the app and reopen it.
-
Update the app to its latest version.
-
Test the meeting in the desktop app and browser version.
-
Disconnect from a VPN for a short test if your workplace policy allows it.
-
Ask whether other participants see the same delay.
If only one platform causes webcam lag, do not replace the camera right away. The problem may be an app setting, browser extension, or temporary service issue.
Why your webcam lags while streaming
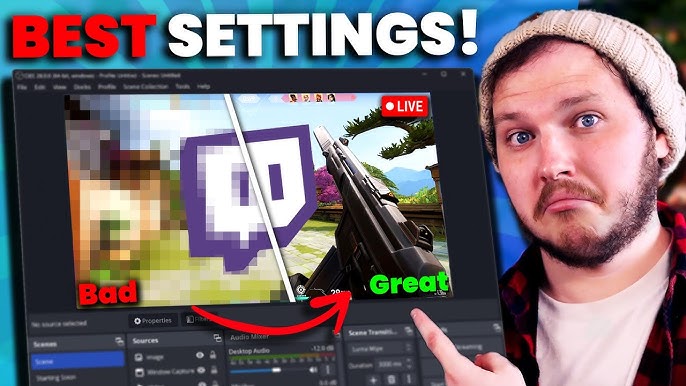
Streaming places a heavier load on your computer than a normal video call. Your system may capture the camera, record the screen, encode the video, run a game, and upload everything at once.
Reduce the camera resolution and stream quality first. Then check your encoder settings in software such as OBS Studio. Hardware encoding may reduce CPU load when your graphics hardware supports it.
Also watch for overheating. When a computer becomes too hot, it may reduce processor speed to protect the hardware. Keep air vents clear and avoid placing a laptop on a soft bed or couch during a stream.
A useful test is to stream a simple scene without a game or screen capture. If the webcam becomes smooth, the original scene was probably too demanding.

Common mistakes that make webcam lag worse
Many people replace the webcam too soon. A new camera will not solve slow Wi-Fi, high CPU use, poor lighting, or an overloaded USB hub.
Avoid these mistakes:
• Running several camera apps at the same time
• Using 1080p or 4K when 720p is enough
• Placing the webcam behind a bright window
• Ignoring upload speed
• Using a damaged USB cable
• Installing drivers from unknown websites
• Leaving virtual backgrounds enabled on an older computer
• Testing only inside one video app
In my own troubleshooting work, the fastest improvements often came from simple changes: closing a browser full of tabs, adding a front-facing lamp, and switching from a USB hub to a direct port. These steps cost nothing and can reveal the real cause before you spend money.
When you should replace your webcam
Consider replacing the webcam when it lags in multiple apps, on more than one computer, and with different USB cables. Hardware damage becomes more likely if the camera also flickers, disconnects, shows colored lines, or fails after warming up.
Before buying a new model, check your computer’s ports and operating system support. A basic 720p or 1080p webcam is enough for most calls. Features such as autofocus, a built-in microphone, and low-light correction may be more useful than very high resolution.
A new webcam cannot fix an unstable network. If other online activities also freeze or disconnect, investigate your internet service or router first.

How to prevent webcam lag
Once your webcam works smoothly, a few habits can help keep it that way.
• Restart your computer before important meetings
• Keep your operating system and video apps updated
• Use a direct USB connection
• Keep the camera lens clean
• Use steady front lighting
• Close heavy apps before a call
• Avoid unnecessary camera effects
• Use Ethernet for critical meetings when possible
• Test your setup before a presentation
A short test call can prevent a stressful meeting. Check your image, audio, lighting, and internet connection a few minutes before you need to go live.
Frequently Asked Questions About Why Is My Webcam Lagging
Why is my webcam lagging but my internet seems fast?
A fast download speed does not guarantee a stable upload connection. High CPU use, Wi-Fi interference, camera effects, or an outdated driver can also cause webcam lag.
Why is my webcam lagging only on Zoom?
Zoom may be using virtual backgrounds, filters, high video quality, or extra processing. Test the camera in another app, then lower Zoom’s video quality and turn off visual effects.
Can poor lighting cause webcam lag?
Yes, poor lighting can make a webcam use slower exposure settings. The image may look blurry or delayed, so adding soft light in front of you can improve motion clarity.
Why is my external webcam lagging?
A weak USB port, damaged cable, overloaded hub, outdated driver, or high camera resolution may cause the problem. Connect the webcam directly to another port and test it at 720p.
Will a faster computer fix webcam lag?
A faster computer may help when the processor or memory is overloaded, but it will not fix weak Wi-Fi or a faulty camera. Test the webcam offline first to identify the source.
Why is my webcam lagging while gaming?
Gaming uses CPU, GPU, memory, and network resources that your webcam also needs. Lower game settings, reduce camera quality, and use hardware encoding when supported.
How do I know if my webcam is broken?
Test it in a basic camera app, with another cable, and on another computer. If it still lags or disconnects in every test, the webcam may have a hardware fault.
Conclusion
The answer to “why is my webcam lagging” usually involves one of five areas: computer resources, internet stability, camera settings, software, or the USB connection. Start with simple fixes such as restarting your computer, closing heavy apps, improving lighting, lowering video quality, and testing another USB port.
Work through the steps one at a time instead of changing everything at once. That approach makes the cause easier to find and helps you avoid buying equipment you do not need. Test your setup before your next call, and share your experience or questions in the comments.