Chrome camera problems usually come from blocked permissions, a wrong camera choice, another app using it, or outdated software.
If you are asking, “why is my camera not working on Chrome?”, the answer is usually easier to find than it seems. Chrome, your operating system, the website, and the camera must all work together. This guide explains how to find the failed link, fix it safely, and prevent the problem from coming back.
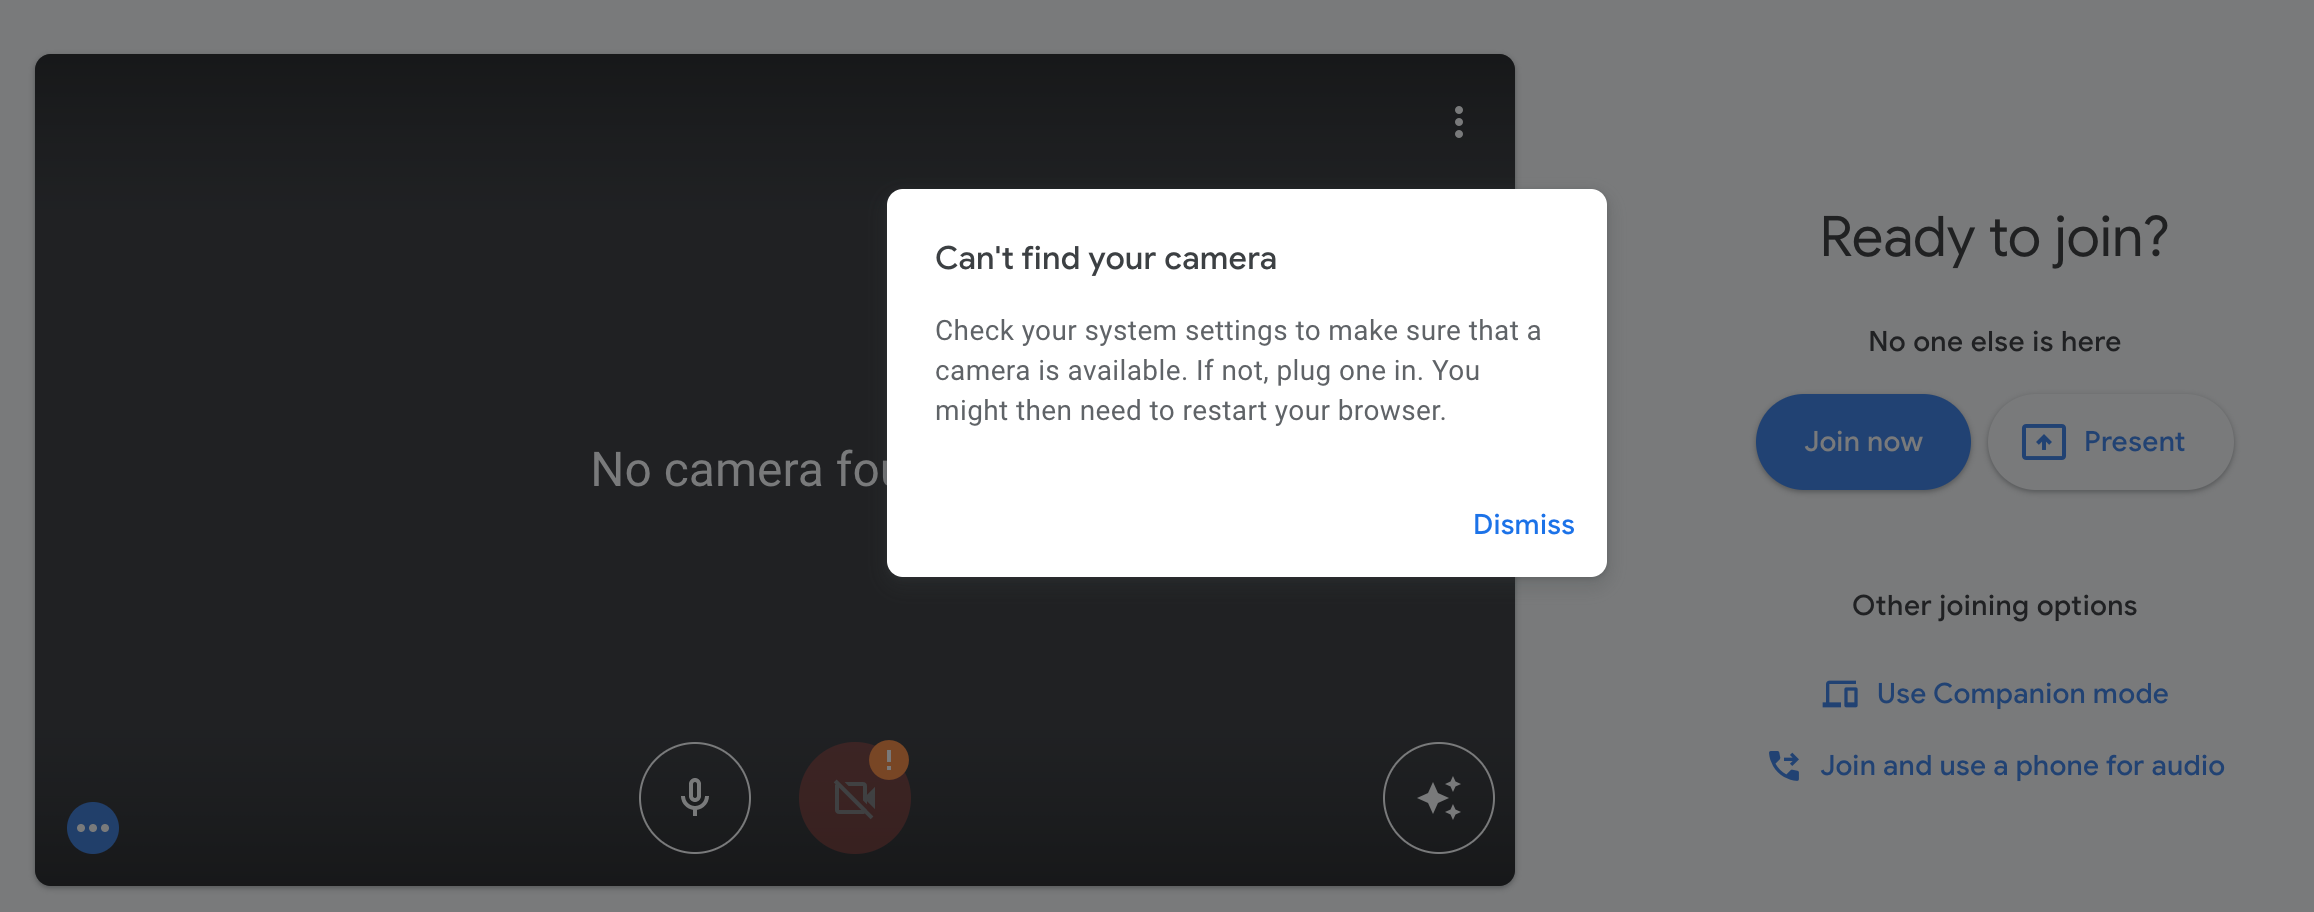
Why Is My Camera Not Working on Chrome?
Your camera may not work on Chrome because the browser does not have permission to use it. A website may also be blocked, your computer may have selected the wrong camera, or another app may already be using the device.
Common causes include:
• Chrome camera permission is blocked for the website.
• Your computer has denied camera access to Chrome.
• The website does not use a secure connection.
• Another app, such as Zoom or Microsoft Teams, is using the camera.
• Chrome selected a virtual camera or a disconnected device.
• A camera driver or system update is missing.
• A browser extension is interfering with video access.
• The camera has a physical privacy shutter or keyboard switch enabled.
• The camera is damaged or not connected correctly.
Think of camera access as a chain. The camera must work first. Then your operating system must allow Chrome to use it. Finally, the website must receive permission. If one link breaks, the video stays off.
Check the Camera Permission in Chrome
The most common reason for camera trouble is a blocked site permission. Chrome lets you control camera access for each website, so one site may work while another does not.
Follow these steps:
-
Open the website that needs your camera.
-
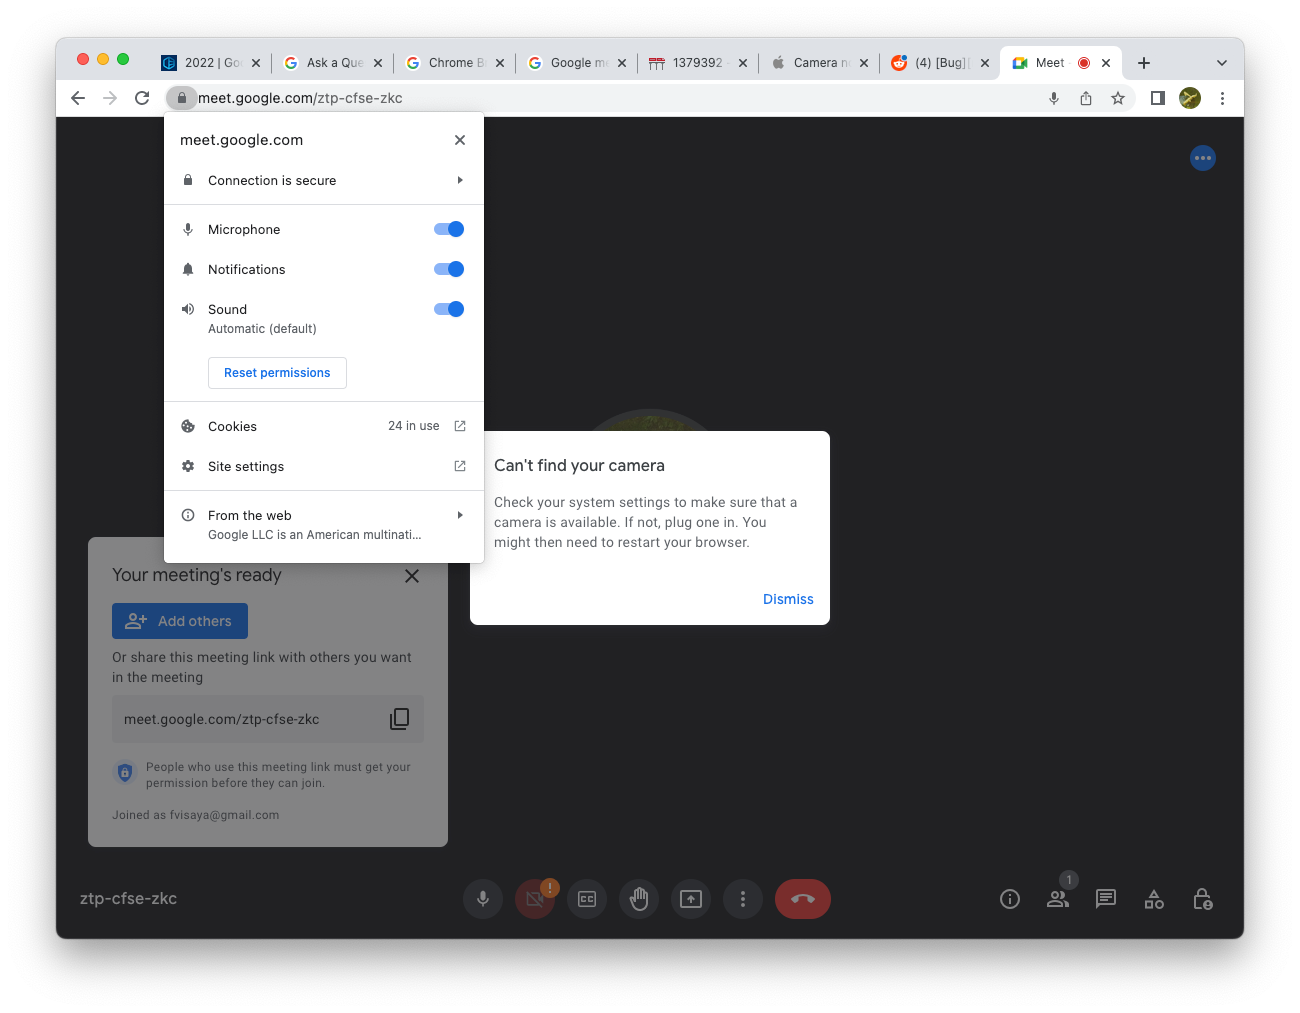
Select the lock icon or settings icon beside the website address.
-
Find Camera in the permissions list.
-
Change the setting to Allow.
-
Refresh the page.
-
Close and reopen the video call if the camera still does not appear.
You can also manage camera access from Chrome settings:
-
Open Chrome.
-
Select the three-dot menu in the upper-right corner.
-
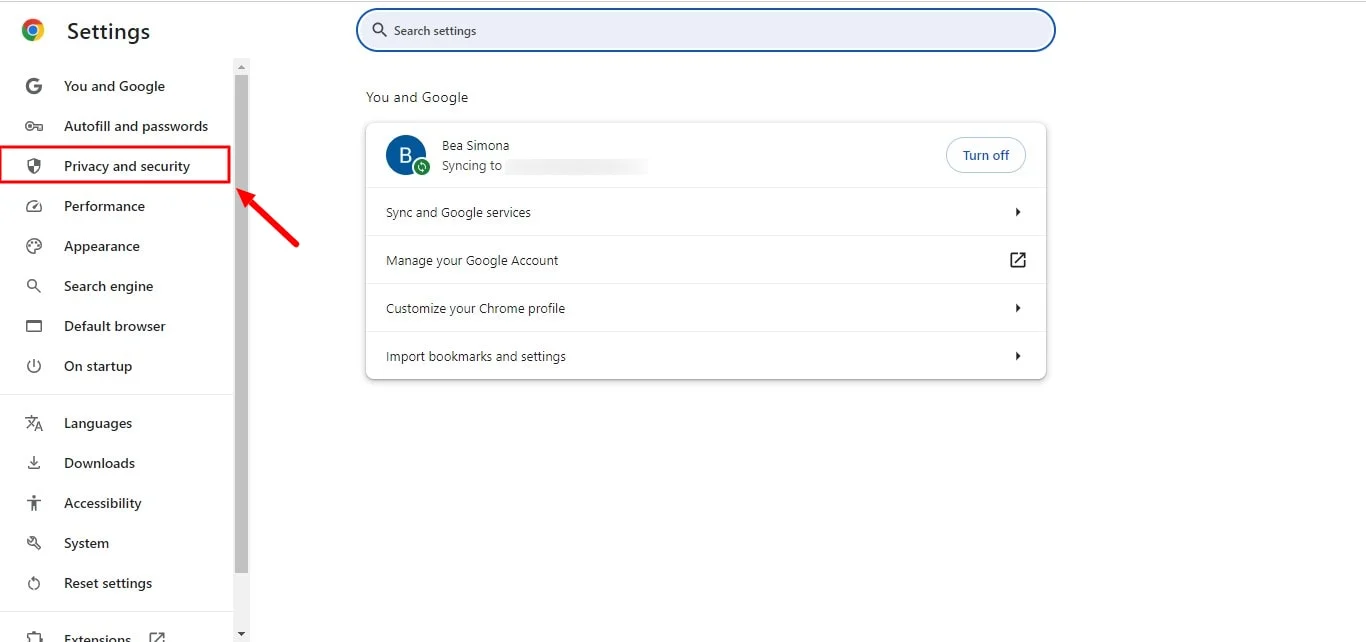
Choose Settings.
-
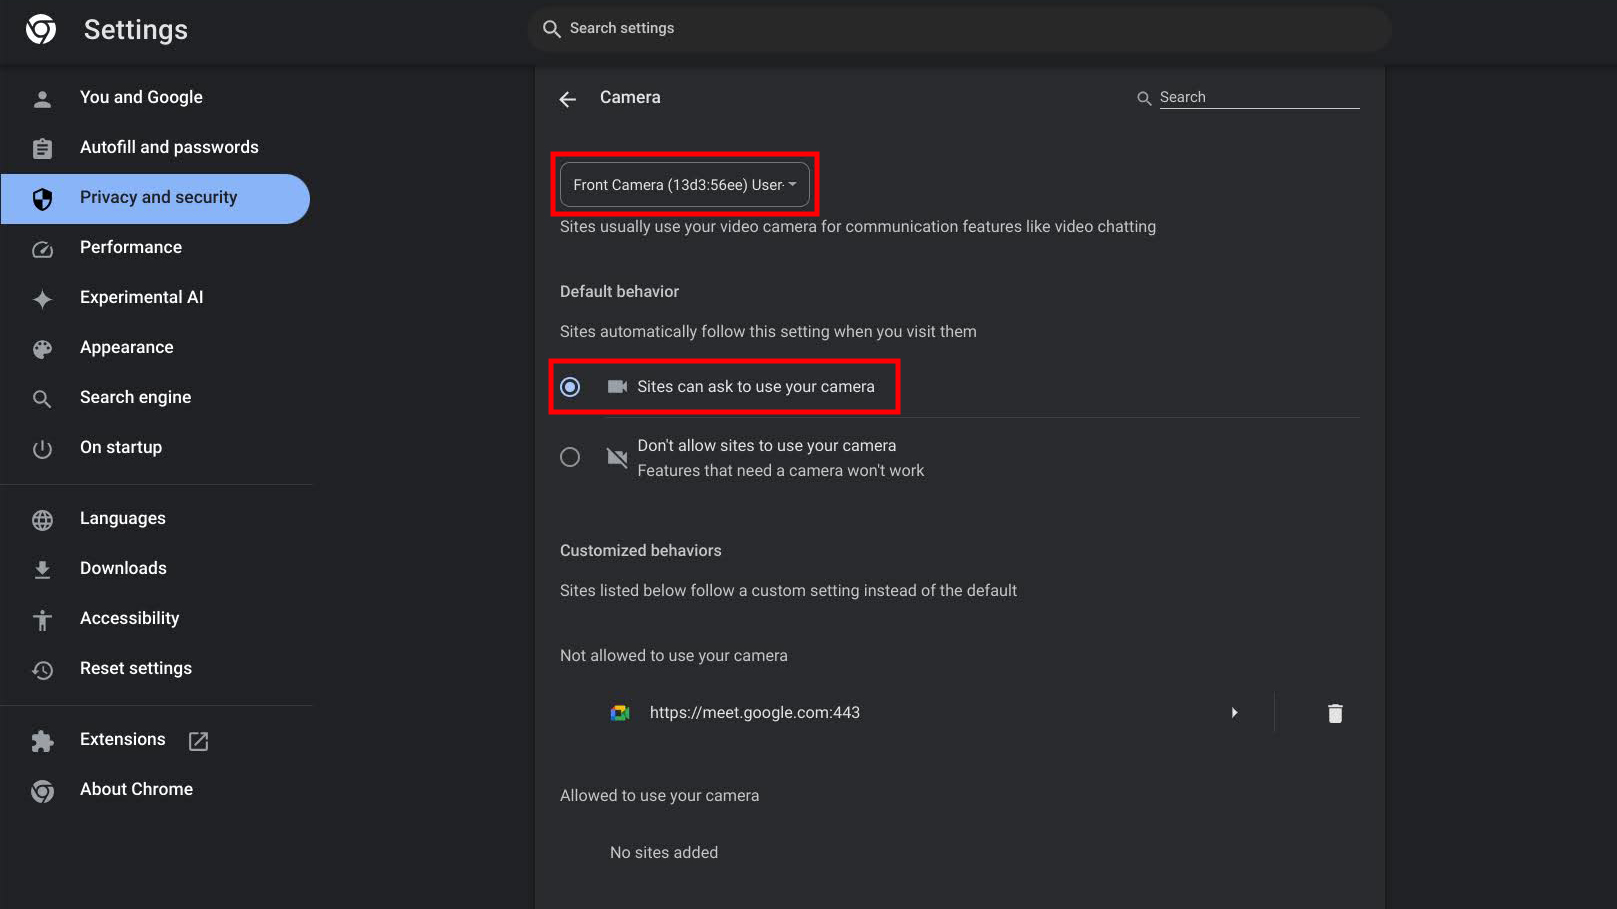
Select Privacy and security.
-
Open Site settings.
-
Select Camera.
-
Make sure websites can ask to use your camera.
-
Check the blocked list and remove the website if needed.
If you previously selected “Block,” Chrome may remember that choice. This explains why your camera works on one website but not another. Resetting the site permission often fixes the issue within a minute.

Allow Camera Access in Windows or macOS
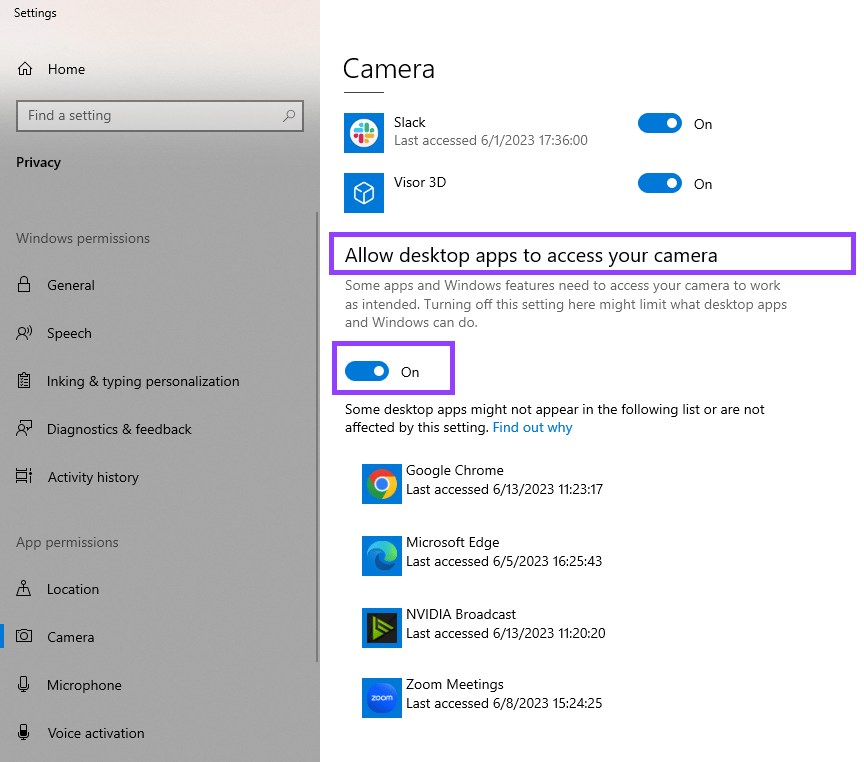
Chrome permission is only one part of the process. Windows and macOS have their own privacy controls. If the operating system blocks the browser, changing Chrome’s settings will not solve the problem.
Windows camera privacy settings
On Windows 11 and Windows 10:
-
Open Settings.
-
Select Privacy and security.
-
Choose Camera.
-
Turn on Camera access.
-
Turn on Let apps access your camera.
-
Turn on Let desktop apps access your camera.
Chrome is treated as a desktop app. If desktop camera access is off, Chrome may show a black screen or no camera at all.
macOS camera privacy settings
On a Mac:
-
Open the Apple menu.
-
Select System Settings.
-
Choose Privacy & Security.
-
Select Camera.
-
Turn on access for Google Chrome.
-
Quit Chrome and open it again.
macOS may require you to restart Chrome after changing this permission. If Chrome does not appear in the camera list, visit a website that requests camera access, then check the setting again.
A useful lesson from real troubleshooting is to check system privacy settings early. Many people spend time reinstalling Chrome when the operating system has simply turned off camera access.
Make Sure Chrome Uses the Correct Camera
Many computers have more than one camera. You may have a built-in webcam, a USB webcam, a monitor camera, or a virtual camera created by another program.
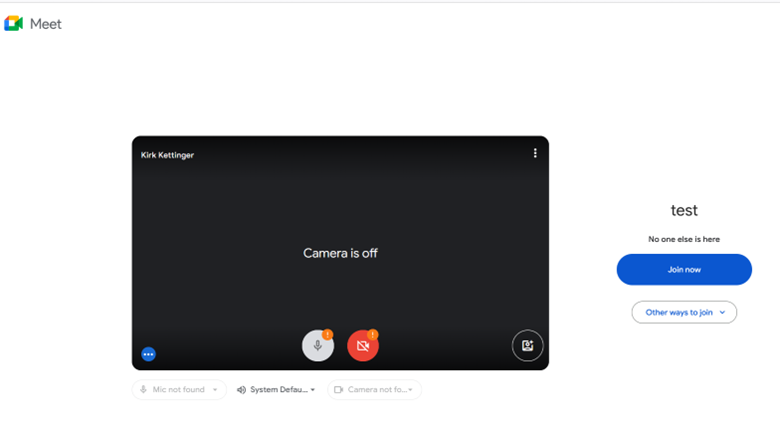
A website may select the wrong device by default. It may choose a virtual camera with no video, even though your physical webcam works.
To choose the correct camera:
-
Open the video meeting or recording website.
-
Open its video or device settings.
-
Find the Camera menu.
-
Select your built-in or external webcam.
-
Check the preview image.
-
Save the setting if the website provides a save option.
You can also check Chrome’s default camera:
-
Open Chrome Settings.
-
Select Privacy and security.
-
Choose Site settings.
-
Select Camera.
-
Pick the correct camera from the drop-down menu.
If you use an external webcam, unplug it and connect it again. Try another USB port. Avoid using a loose hub during testing because low power or a poor connection can make the camera vanish.
Close Other Apps Using the Camera
A camera often cannot serve several apps at the same time. If Zoom, Teams, Skype, FaceTime, a camera app, or another browser tab is using it, Chrome may show a black screen or report that no camera is available.
Close apps that may be using video:
• Zoom
• Microsoft Teams
• Skype
• Discord
• FaceTime
• OBS Studio
• The Windows Camera app
• Another Chrome window or browser
After closing those apps, reload the website. If the issue remains, restart the computer. A full restart can release a camera that stayed locked after an app closed badly.
On Windows, open Task Manager with Ctrl + Shift + Esc and close programs that may use the webcam. On macOS, use Force Quit if an app remains open. Only close apps you recognize.
This is one reason why is my camera not working on Chrome can feel confusing. The camera may be healthy, but another program has control of it.
Test Whether the Camera Works Outside Chrome
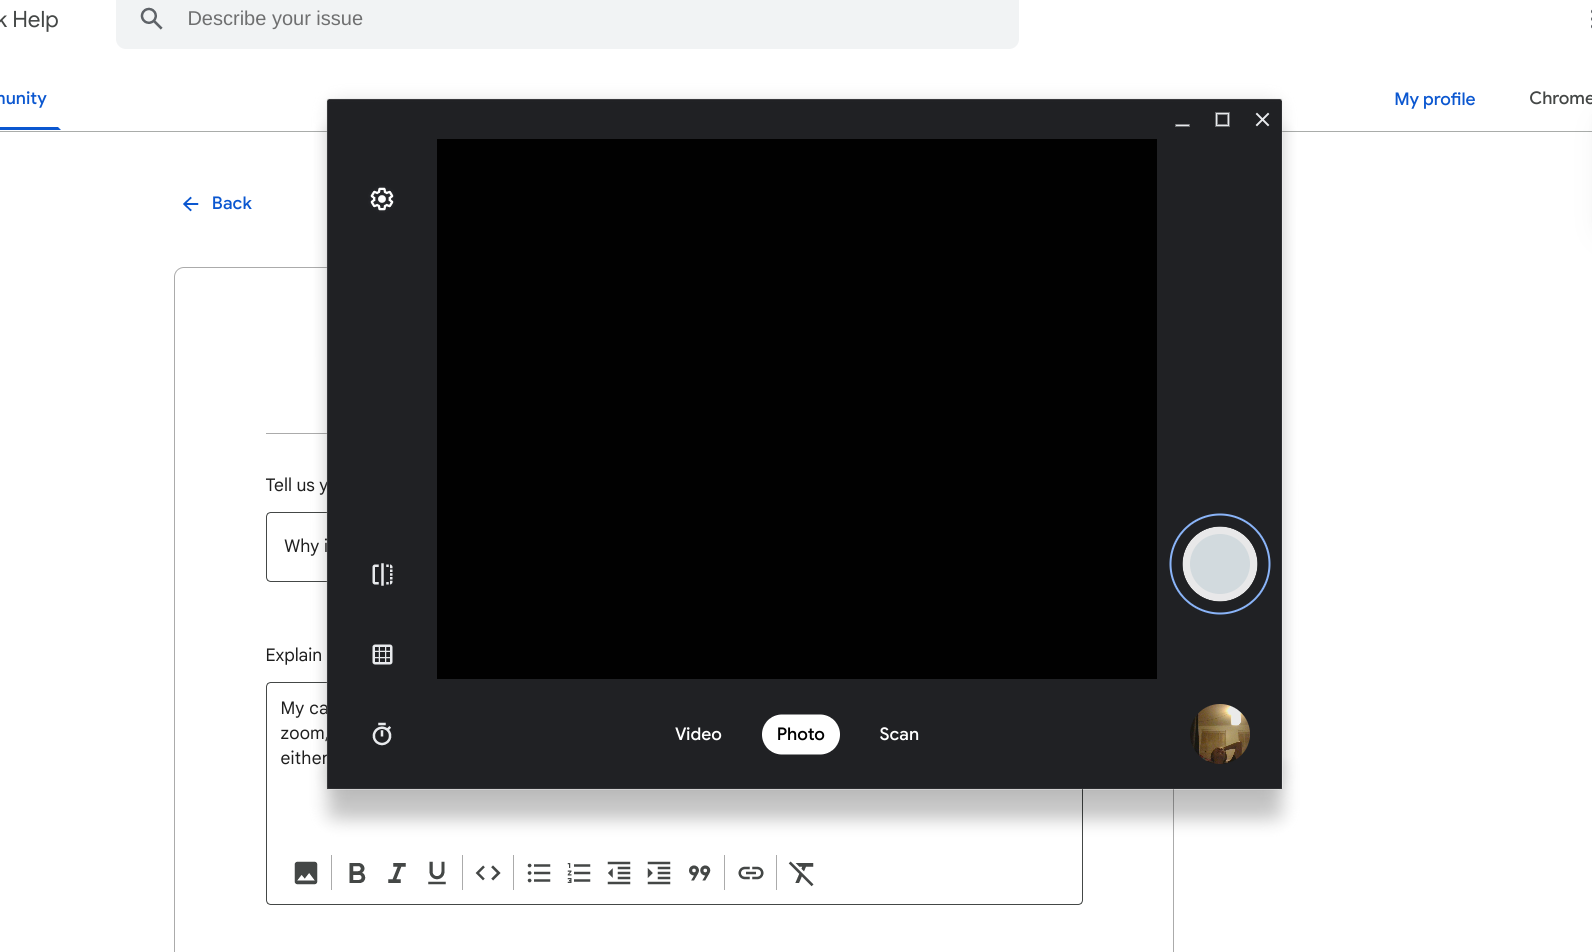
Before changing advanced settings, test the camera in another app. This tells you whether the problem belongs to Chrome or the camera system itself.
Try these checks:
-
Open the built-in Camera app on Windows.
-
Open Photo Booth or another trusted camera app on macOS.
-
Test the webcam in another browser.
-
Check whether the camera indicator light turns on.
-
Try a different USB port for an external webcam.
If the camera works in another app but not Chrome, focus on browser permissions, extensions, website settings, and the selected camera. If the camera fails everywhere, the issue may involve drivers, hardware, privacy switches, or the camera connection.
This simple test prevents wasted effort. There is no need to reset Chrome when the webcam is not detected by the computer at all.
Disable Extensions and Try Incognito Mode
Browser extensions can change page behavior, block scripts, or affect privacy permissions. Security, ad blocking, video control, and webcam extensions are common suspects.
To test extensions:
-
Open Chrome’s three-dot menu.
-
Select Extensions.
-
Choose Manage extensions.
-
Turn off extensions that control privacy, video, or page content.
-
Reload the camera website.
You can also open an Incognito window and visit the website there. Incognito mode usually runs without most saved site data and extensions, depending on each extension’s settings.
If the camera works in Incognito mode, an extension or stored website data is likely causing the problem. Turn extensions on one at a time to identify the source. Do not leave an extension disabled if you need it for security or work without checking its purpose first.
Clear Site Data and Reset Camera Permissions
Corrupted cookies or old permissions can stop a website from requesting the camera correctly. Clearing data for one website is safer than deleting all browser data.
To clear data for the affected website:
-
Open Chrome Settings.
-
Select Privacy and security.
-
Choose Third-party cookies or Site data, depending on your Chrome version.
-
Open the option to view site data and permissions.
-
Search for the website.
-
Remove its stored data.
-
Reopen the website and allow camera access when asked.
You can also select the camera permission icon beside the address bar and reset permissions. The website should then ask for access again.
Before clearing data, remember that you may be signed out of the website. Keep your login details available. This step often solves problems caused by an old permission choice or a damaged session.
Update Chrome, Your Operating System, and Camera Drivers
Outdated software can create camera problems, especially after a major operating system update. Chrome updates include security fixes and compatibility changes that can affect device access.
To update Chrome:
-
Open the three-dot menu.
-
Select Help.
-
Choose About Google Chrome.
-
Allow Chrome to check for updates.
-
Relaunch the browser.
On Windows, update the camera driver through Device Manager:
-
Right-click the Start button.
-
Open Device Manager.
-
Expand Cameras or Imaging devices.
-
Right-click the webcam.
-
Choose Update driver.
You can also visit the computer maker’s support page for approved drivers. Avoid random driver websites because they may provide unsafe or incorrect files.
On macOS, camera updates usually arrive through macOS updates rather than a separate driver download. Open System Settings, choose General, and check Software Update.
Check Physical Camera Controls
Some laptops have a camera shutter, privacy slider, or function key. These controls can block the lens even when Chrome has full permission.
Look for:
• A sliding cover above the screen.
• A camera icon on a function key.
• A privacy switch on the side of the laptop.
• A red or orange indicator near the lens.
• A removable cover that sits over the webcam.
If your laptop has a function key, press it once and test the camera again. You may need to hold the Fn key as well. Read the symbols carefully, because some keys control the microphone rather than the camera.
For an external webcam, check the cable and indicator light. A camera with no power cannot send video to Chrome.
Fix Camera Problems on a Chromebook
Chromebooks use Chrome as their main browser, but camera access can still fail because of permissions, school controls, or hardware settings.
Try these steps:
-
Restart the Chromebook.
-
Open the website and allow camera access.
-
Select the correct camera in the website’s settings.
-
Check for ChromeOS updates.
-
Test the camera in the built-in Camera app.
-
Disconnect external camera devices.
If the Chromebook belongs to a school or employer, an administrator may control camera permissions. In that case, you may not be able to change the setting yourself. Contact the administrator rather than trying to bypass the restriction.
A camera that works in the Chromebook Camera app but fails on a website usually points to a site permission or browser issue.
Fix a Black Screen, Frozen Video, or Poor Camera Image
Not every camera issue means the camera is completely blocked. Chrome may show a black screen, frozen image, blurry video, or a camera that turns off after a few seconds.
Try these solutions:
• Improve the room lighting.
• Clean the camera lens with a soft, dry cloth.
• Close other video apps.
• Select a different camera and switch back.
• Reload the page.
• Restart Chrome.
• Restart the computer.
• Move closer to your Wi-Fi router if the video freezes during a call.
• Turn off background video effects.
• Check whether the website limits camera quality.
A black screen with a working camera light often points to software or permission trouble. A frozen image may be caused by another app, a weak connection, or a browser process that needs to restart.
If your camera image is blurry, check the lens before changing settings. Dust, fingerprints, and a sliding privacy cover are simple causes that are easy to miss.
Advanced Fixes When Chrome Camera Access Still Fails
If the basic steps do not work, use these options carefully.
Reset Chrome settings
Chrome lets you restore settings without deleting bookmarks or saved passwords. Open Settings, select Reset settings, and choose Restore settings to their original defaults.
This can remove unwanted changes, but it may disable extensions and clear some preferences. Use it after testing permissions and other apps.
Create a fresh Chrome profile
A damaged browser profile can cause strange permission errors. Create a new Chrome profile and test the same website. If the camera works there, the original profile may contain corrupted settings or an extension conflict.
Check security software
Some antivirus tools and privacy apps include webcam protection. They may block Chrome even when Windows or macOS allows it. Open the security app and look for webcam, privacy, or browser protection settings.
Only change settings when you understand what they do. Re-enable protection after testing.
Try a different network
A network rarely stops the camera device itself, but it can interrupt a video call. If the camera preview works while the call fails, test another network or restart your router.
Reinstall Chrome as a last resort
Reinstalling Chrome can help with damaged browser files, but it is rarely the first solution. Save important data and confirm that your bookmarks and passwords are synced before removing the browser.
When the Camera May Need Repair
If the camera does not work in Chrome, another browser, or the computer’s camera app, the problem may be hardware-related.
Possible signs include:
• The camera does not appear in system settings.
• The camera disconnects when the cable moves.
• The device manager shows an error symbol.
• The camera has visible damage.
• A built-in camera stopped working after a screen repair.
• An external webcam fails on several computers.
Try the camera on another computer if possible. This test can separate a faulty webcam from a computer problem.
For a built-in camera, contact the computer manufacturer or a qualified repair center. For an external webcam, check its warranty or replace it with a trusted model. Do not open a laptop unless you have the right tools and repair experience.
How to Prevent Chrome Camera Problems
Once your camera works, a few habits can reduce future problems.
• Keep Chrome and your operating system updated.
• Allow camera access only for trusted websites.
• Review camera permissions from time to time.
• Close video apps after meetings.
• Keep the webcam lens clean.
• Avoid unknown browser extensions.
• Use a stable USB connection for external cameras.
• Keep a physical camera cover open when you need video.
• Check privacy settings after a major system update.
It is also wise to test your camera before an important interview, class, or meeting. Open the meeting website several minutes early. This gives you time to fix a permission issue without the pressure of everyone waiting.
Frequently Asked Questions About Why Is My Camera Not Working on Chrome?
Why is my camera not working on Chrome but working in other apps?
Chrome may not have permission to access the camera, or the website may be blocked. Check both Chrome’s camera settings and your computer’s privacy settings, then refresh the website.
Why is my camera not working on Chrome during Google Meet?
Google Meet may be using the wrong camera or may not have permission. Open Meet’s settings, choose the correct camera, and allow camera access beside the Chrome address bar.
Why does Chrome show a black screen instead of my camera?
A black screen can come from a blocked permission, another app using the camera, a privacy shutter, or a selected virtual camera. Close other camera apps, check the lens and permissions, and select the correct device.
How do I give Chrome permission to use my camera?
Open Chrome Settings, select Privacy and security, choose Site settings, and open Camera. Allow camera access and make sure the affected website is not listed under blocked sites.
Can a Chrome extension stop my camera from working?
Yes. Privacy, security, video, and ad blocking extensions can interfere with camera requests. Disable extensions temporarily or test the website in an Incognito window.
Why is my camera not working on Chrome after a Windows update?
A Windows update may change privacy settings or affect the camera driver. Turn on camera access for desktop apps, update the driver, restart the computer, and test the camera in another app.
Does restarting Chrome fix camera problems?
Restarting Chrome can release a camera process that became stuck. Close every Chrome window, quit other video apps, reopen the browser, and try the website again.
Conclusion
When you ask, “why is my camera not working on Chrome?”, start with the simplest checks: website permission, system privacy settings, the selected camera, and other apps using the device. Then test the camera outside Chrome, disable extensions, update software, and inspect physical controls.
Most camera problems are permission or device selection errors, not permanent hardware failures. Work through the steps in order, and test the camera after each change. If this guide helped, share it with someone preparing for a video call or explore more browser troubleshooting tips.