Your laptop camera and microphone may not work because of blocked permissions, muted settings, outdated drivers, or hardware faults.
When you ask, “why is my laptop camera and microphone not working,” the cause is often simple but hidden. A privacy switch, browser permission, app setting, Windows update, macOS control, or loose hardware connection can stop both devices at once. This guide walks you through safe checks, clear fixes, and signs that you need professional help.
Why Is My Laptop Camera and Microphone Not Working?
Your laptop camera and microphone depend on several layers working together. The hardware must be detected by the operating system. The system must allow access. The app or browser must select the correct devices.
If one layer fails, your camera or microphone may appear broken even when the hardware is fine. Think of it like a door with three locks. The device, operating system, and app must all grant access.
Common clues include:
• The camera light does not turn on.
• Video shows a black screen.
• Your microphone records silence.
• The app says no camera or microphone was found.
• The devices work in one app but not another.
• Both devices stopped working after an update or restart.
If both devices fail together, privacy settings, a function key, a webcam shutter, or a system driver are more likely than two separate hardware failures.

Common Reasons Your Laptop Camera and Microphone Stop Working
Understanding the cause helps you avoid random fixes. Start with the most common issues before changing advanced settings.
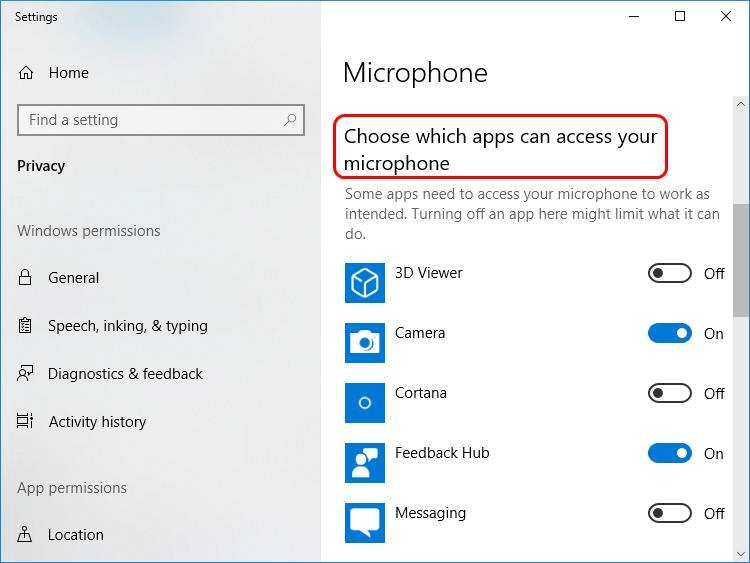
Privacy settings are blocking access
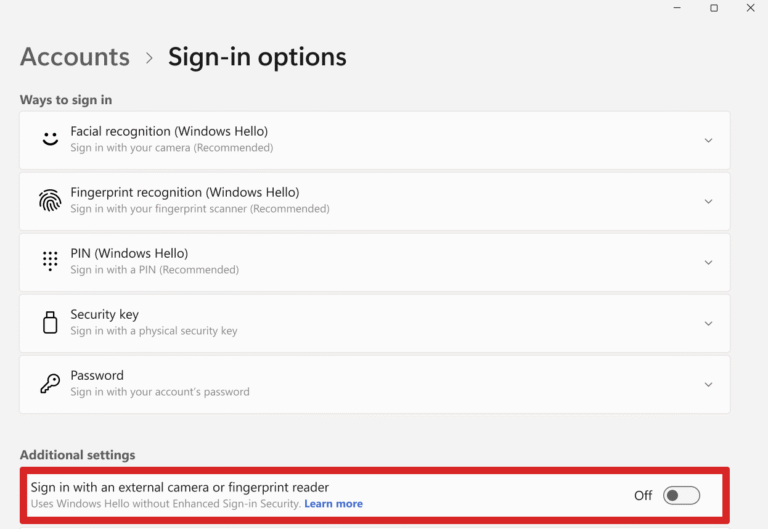
Windows and macOS both include privacy controls for cameras and microphones. These controls can block all apps or only selected apps.
This often happens after:
• A major operating system update
• Installing a new security app
• Changing privacy settings
• Joining a work or school device policy
• Resetting app permissions
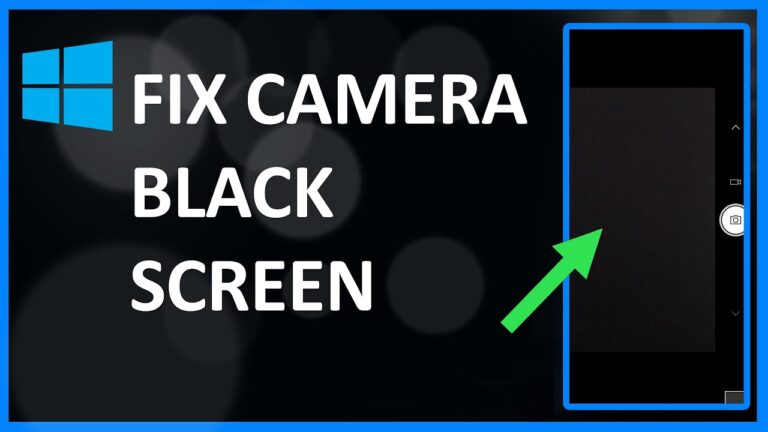
When access is blocked, the camera may show a black screen. The microphone may appear available but record no sound.
The camera shutter or privacy switch is closed
Many modern laptops have a small physical shutter near the webcam. Some also include a side switch or a keyboard key with a camera icon.
A closed shutter creates a black image. A hardware privacy switch may disable the camera and microphone at the same time. Check the top edge of the screen and the sides of the laptop.
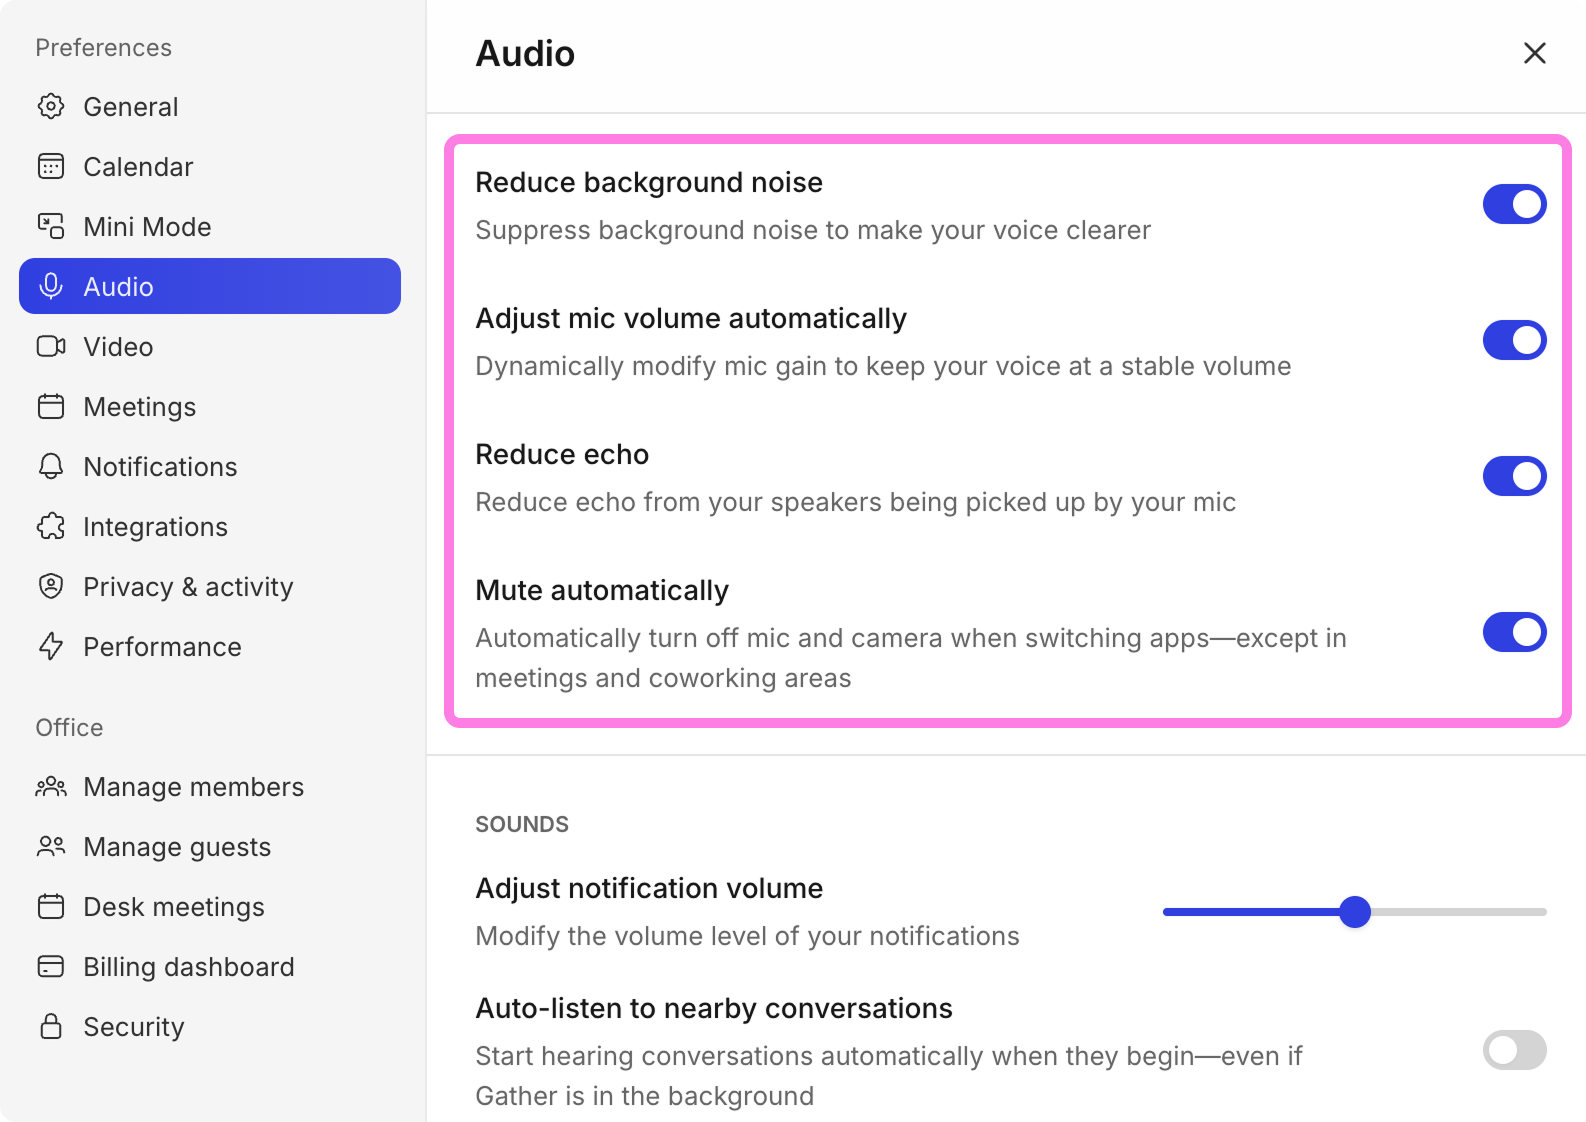
The microphone is muted
Your laptop may have a microphone mute key. It often shows a microphone icon with a line through it. Some models display an orange or red light when the microphone is muted.
The operating system can also mute the microphone. An app may have its own mute button as well, so check all three places.
Another app is using the devices
Only one program may control a camera at a time on some systems. If Zoom, Teams, FaceTime, a browser tab, or a recording app is already using the webcam, another app may show an error.
Close every app that may use the camera or microphone. Then reopen only the app you need.
The wrong input or output device is selected
A laptop may detect several microphones, such as:
• Internal microphone
• Headset microphone
• USB microphone
• Bluetooth headset microphone
If the wrong device is selected, others may hear silence. The same issue can happen with an external webcam.
Drivers or system files are damaged
A driver lets the operating system communicate with hardware. A failed update, corrupted driver, or incompatible manufacturer driver can make the camera or microphone disappear.
This is a common reason why your laptop camera and microphone are not working after a system update.
Your browser lacks permission
Websites such as Google Meet, Microsoft Teams, and online test tools need browser permission. If you clicked “Block” in the past, the website may not ask again.
The browser can also allow the camera but block the microphone, or the other way around.
Hardware damage is possible
A fall, liquid spill, worn display hinge, or damaged cable can affect an internal webcam. Microphone damage may follow the same path because both parts are often placed near the screen bezel.
Hardware trouble becomes more likely if the devices fail in every app, do not appear in system settings, and remain broken after a reset.
What to Check Before Troubleshooting
A few quick checks can save time. They also help you identify whether the problem is physical, system-wide, or limited to one app.
-
Restart the laptop.
-
Disconnect headphones, USB webcams, docks, and Bluetooth audio devices.
-
Open the webcam shutter if your laptop has one.
-
Press the camera or microphone function key once.
-
Check that the app is not muted.
-
Test the camera and microphone in a second app.
-
Install pending operating system updates.
-
Check whether a work or school administrator controls privacy settings.
Try a basic test in the built-in camera and sound apps. If the camera and microphone work there, the hardware is probably healthy. The issue is likely inside the original app or browser.
If they fail everywhere, continue with system permissions and device checks.
Fix Camera and Microphone Problems in Windows
Windows includes separate controls for camera and microphone access. Follow these steps in order.
Allow camera access
-
Open Settings.
-
Select Privacy & security.
-
Select Camera.
-
Turn on Camera access.
-
Turn on Let apps access your camera.
-
Turn on access for the desktop apps you use.
Check the list carefully. Desktop programs may not appear as individual apps, but Windows provides a separate desktop-app permission.
Allow microphone access
-
Open Settings.
-
Select Privacy & security.
-
Select Microphone.
-
Turn on Microphone access.
-
Turn on Let apps access your microphone.
-
Allow access for your meeting or recording app.
After changing these controls, fully close the app and open it again. Some programs do not notice permission changes until they restart.
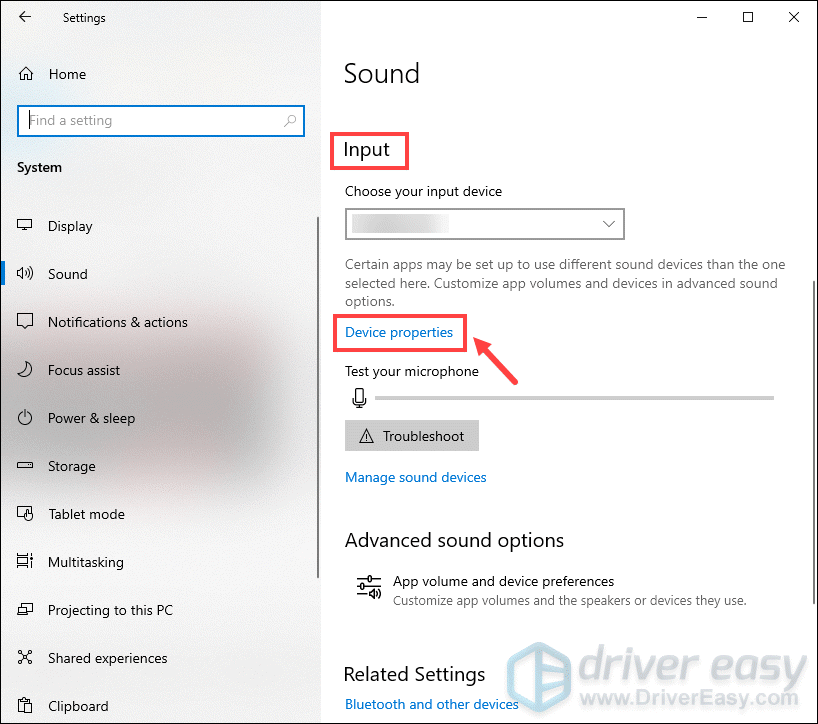
Choose the correct devices
-
Open Settings.
-
Select System.
-
Select Sound.
-
Under Input, choose the microphone you want.
-
Speak and watch the input level.
If the level does not move, select the device properties and make sure the volume is not set to zero. Also check the app’s own audio settings.
For the camera, open the app’s video settings and select the built-in webcam rather than an old USB camera.
Run Windows troubleshooters
Windows may offer automated troubleshooters for audio and connected devices. These tools can correct simple configuration errors, though they cannot repair physical damage.
Use them as a first check, not as a complete diagnosis.
Check Device Manager
-
Right-click the Start button.
-
Open Device Manager.
-
Expand Cameras or Imaging devices.
-
Expand Audio inputs and outputs.
-
Look for warning symbols.
If a device is disabled, right-click it and choose Enable device. If the driver is damaged, choose Update driver or uninstall the device, then restart the laptop. Windows may reinstall the driver automatically.
For the best result, compare the driver with the laptop maker’s support page. Manufacturer drivers can work better than generic drivers, especially for special privacy keys.
Fix Camera and Microphone Problems on a Mac
macOS also separates privacy permissions for the camera and microphone. The menu names may vary slightly by macOS version.
Allow camera access on macOS
-
Open the Apple menu.
-
Select System Settings.
-
Choose Privacy & Security.
-
Select Camera.
-
Turn on access for the app you want to use.
Quit the app completely before testing again. A simple window close may not be enough, so use the app’s Quit command.
Allow microphone access on macOS
-
Open System Settings.
-
Select Privacy & Security.
-
Choose Microphone.
-
Enable the app that needs audio access.
If the app is not listed, open it and try to use the microphone. macOS may then request permission.
Select the right sound input
-
Open System Settings.
-
Choose Sound.
-
Select Input.
-
Choose the built-in microphone or connected headset.
-
Speak and watch the input level.
If the meter moves, the microphone is receiving sound. The remaining issue may be inside the meeting app.
Check Screen Time restrictions
Screen Time controls can restrict cameras on some Macs. If the camera works in one account but not another, review Screen Time and family restrictions.
A managed Mac may also have a company or school profile that prevents camera access. In that case, an administrator may need to change the setting.
Restart and update macOS
Restart the Mac after changing permissions. Then install available macOS updates through System Settings.
Updates often include device, security, and app compatibility improvements. However, if the problem began immediately after an update, check the laptop manufacturer or app maker for known issues before installing unofficial drivers.

Fix Camera and Microphone Problems in Zoom, Teams, Meet, and Other Apps
If your devices work in the built-in camera or sound test, the problem is likely app-specific.
Open the app’s settings and check these options:
• Camera: Select the built-in webcam or the correct USB camera.
• Microphone: Select the internal microphone or correct headset.
• Speaker: Choose the device you use to hear others.
• Mute status: Confirm that neither you nor the app is muted.
• Automatic volume: Turn it on first, then adjust it manually if needed.
In Zoom, Teams, and similar apps, use the built-in test feature before joining a call. A test can show whether the app hears your voice and displays your video.
Also check whether another meeting is open in a second browser tab. Close duplicate sessions. Then restart the app.
Check browser permissions
For Chrome, Edge, Firefox, or Safari:
-
Open the meeting website.
-
Select the lock or site settings icon near the address bar.
-
Set Camera to Allow.
-
Set Microphone to Allow.
-
Reload the page.
If the site still cannot access the devices, open the browser’s privacy settings and remove the old permission. Visit the site again and choose Allow when asked.
Private browsing modes, strict tracking controls, and workplace browser policies can also affect access. Test the site in a normal browser window to compare results.

How to Test the Camera and Microphone
A proper test should check the devices separately. This prevents you from fixing the wrong problem.
Test the camera
Use the built-in Camera app on Windows or an Apple camera app on macOS. Look for a clear image and check whether the camera indicator light turns on.
If the image is black but the indicator light works, the shutter may be closed, the lens may be covered, or an app may be sending a bad video signal.
If the camera does not appear at all, check privacy settings and Device Manager or System Information.
Test the microphone
Use the Windows Sound Recorder app or a basic audio recording tool on macOS. Record a short sentence and play it back.
Listen for:
• Complete silence
• Very low volume
• Static or crackling
• Delayed sound
• Sound from the wrong microphone
A quiet recording may result from a low input level rather than a failed microphone. Move closer, remove a headset, and test again.
Test with an external device
Connect a known working USB webcam or headset. If the external device works, your built-in camera or microphone may have a hardware problem.
If the external device also fails, permissions, drivers, ports, or operating system settings are more likely.
Advanced Fixes When Basic Steps Fail
Use advanced steps only after checking permissions, app settings, and physical switches.
Roll back a recent driver
If the camera or microphone stopped working after a driver update, Device Manager may offer a Roll Back Driver option. This returns the device to its earlier driver.
The option may be unavailable if Windows has removed the previous driver. Do not download drivers from random websites. Use Windows Update or the laptop manufacturer’s official support page.
Reinstall the device
In Device Manager, you can uninstall the camera or microphone device and restart the laptop. Windows may detect it again and install a fresh driver.
Before doing this, save your work and create a restore point if possible. Avoid removing unknown system devices.
Check BIOS or UEFI settings
Some laptops let you disable the webcam in BIOS or UEFI firmware. This setting is separate from Windows privacy controls.
Restart the laptop and open the firmware setup using the key shown on screen. Look for a setting such as Integrated Camera, Webcam, or Internal Audio. Only change settings you understand.
Check antivirus and security software
Some security tools include webcam protection. They may block camera access while allowing other functions.
Open the security program and review its privacy or device protection settings. Do not disable protection permanently. If you test by turning it off, turn it back on immediately afterward.
Use a system restore or recovery option
If the issue began after a major change, System Restore on Windows or a macOS recovery option may help. Back up important files first.
Recovery is not always the best answer. It can remove recent apps or settings, and it may not fix damaged hardware.
When the Problem Is a Hardware Fault
Software troubleshooting cannot repair a broken camera cable or damaged microphone. Look for these warning signs:
• The camera and microphone fail in every app.
• The devices are missing from system settings.
• The laptop suffered a fall or liquid spill.
• The camera works when the screen is moved to one angle.
• The microphone produces constant static.
• External devices work normally.
A camera that changes when you move the display may have a worn cable near the hinge. Stop adjusting it repeatedly, since this can make the damage worse.
If liquid reached the laptop, shut it down and disconnect power. Do not keep testing it. A qualified repair technician can inspect the device safely.
For a laptop under warranty, contact the manufacturer before opening the case. Self-repair may affect warranty coverage, depending on the policy and location.
Mistakes to Avoid During Troubleshooting
When people ask why is my laptop camera and microphone not working, they often try risky fixes too soon. Avoid these common mistakes.
• Do not install random driver tools from pop-up ads.
• Do not grant camera access to unknown websites.
• Do not disable antivirus protection for a long period.
• Do not remove every audio device in Device Manager.
• Do not assume a black camera image means the webcam is dead.
• Do not test only one app.
• Do not forget physical mute keys and camera shutters.
• Do not open a laptop with a swollen battery or liquid damage.
A careful process is faster than guessing. Change one setting at a time, then test. Write down what you changed so you can reverse it if needed.
One useful lesson from real-world laptop support is that app settings are often overlooked. People may spend an hour reinstalling drivers when the meeting app is simply using a Bluetooth headset that is turned off.
How to Prevent Future Camera and Microphone Issues
You can reduce repeat problems with a few simple habits.
• Keep Windows or macOS updated.
• Install drivers from the laptop maker or operating system.
• Review camera and microphone permissions every few months.
• Keep the webcam lens clean.
• Avoid covering the microphone holes with stickers or cases.
• Close meeting apps after use.
• Label your USB webcam and headset in device settings.
• Keep a basic wired headset for important calls.
• Test your setup before an interview, class, or work meeting.
A short test before an important call can prevent stress. Record ten seconds of video and audio. Check both the picture and the playback.
If privacy matters, use the physical camera shutter when available. For microphones, mute the device or disconnect it when you do not need it. Privacy tools are helpful, but they can also cause confusion if you forget that they are active.
Frequently Asked Questions About Why Is My Laptop Camera and Microphone Not Working
Why is my laptop camera and microphone not working after an update?
An update may reset privacy permissions, replace a driver, or change the default input device. Check camera and microphone permissions first, then confirm the correct devices in the app and system sound settings.
Why does my camera work but my microphone does not?
The microphone may be muted, blocked by permission settings, or set to the wrong input device. Test it in a recording app and choose the correct microphone in your meeting app.
Why is my laptop camera showing a black screen?
A physical shutter may be closed, a privacy key may be active, or another app may control the camera. Check the lens, close other video apps, and confirm camera access in system settings.
How do I know whether my laptop camera is broken?
Test the camera in more than one app and check whether it appears in system settings. If it fails everywhere but an external webcam works, the built-in camera or its cable may need repair.
Can a browser block my laptop microphone?
Yes. Browsers ask for permission for each website, and choosing Block can prevent access later. Open the website’s permission settings, allow the microphone, and reload the page.
Why do my camera and microphone work with a USB headset or webcam?
This usually suggests that the operating system and app are working, while the built-in hardware, cable, or internal driver may have a problem. Continue using the external device or arrange a hardware inspection.
[CodeImg not required]
Conclusion
The answer to why is my laptop camera and microphone not working is usually found in privacy permissions, mute controls, app settings, device selection, or drivers. Start with simple checks, test the devices in more than one app, and make one change at a time.
If the devices remain missing or fail after a spill, drop, or hinge problem, seek professional repair instead of forcing more software fixes. Run a quick camera and microphone test before your next call, and share this guide with anyone facing the same issue.