Build a simple, reliable voice recorder using a microphone, microcontroller, and microSD card.
I’ve built and tested many pocket recorders and DIY audio projects, so I’ll guide you step by step on how to make voice recorder devices that actually work. This article covers basic and advanced builds, parts lists, wiring tips, software settings, testing methods, legal points, and real lessons I learned while building and debugging recorders. Read on to learn practical, trustworthy advice for building your own voice recorder at home or for a small project.

What is a voice recorder and why build one?
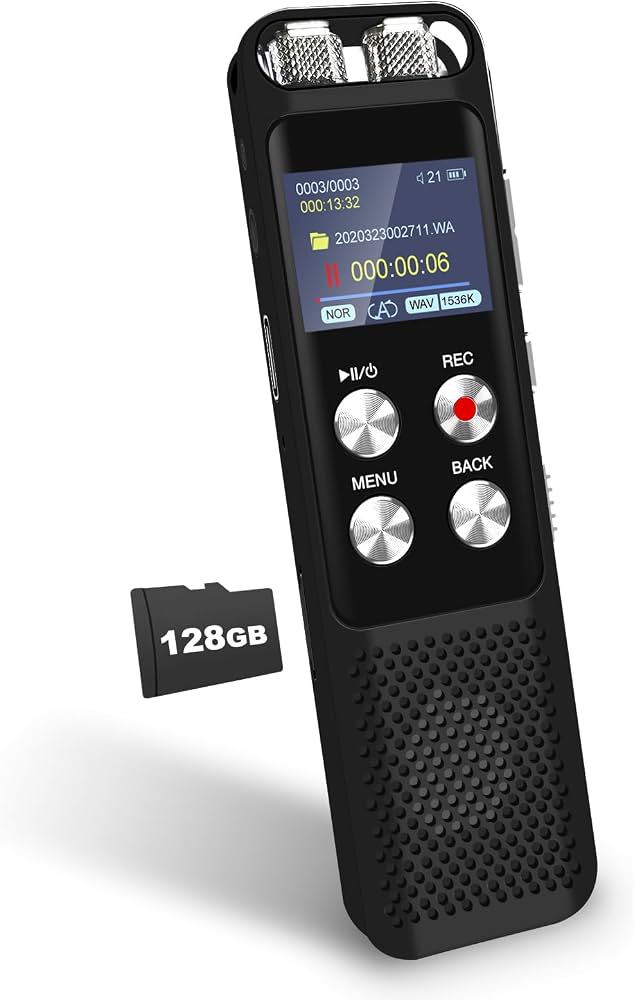
A voice recorder captures audio using a microphone and saves it for playback or processing. A basic recorder has a microphone, an amplifier, a way to convert analog sound to digital data, storage, and a power source. Building your own lets you customize size, range, battery life, and file format. This guide will show how to make voice recorder projects from a simple one-button gadget to a multi-hour digital unit.

Materials and tools you need
A clear parts list helps you plan cost and complexity. Use quality parts for better sound and reliability. Below are common items used when learning how to make voice recorder devices.
- Microphone module
- Electret condenser capsule or MEMS microphone module for digital builds.
- Analog-to-digital converter or microcontroller with ADC
- Examples include Arduino, ESP32, or dedicated audio codec chips.
- Storage medium
- microSD card with an adapter or internal flash memory.
- Power source
- USB power bank, rechargeable Li-ion battery with a protection board, or AA battery holder.
- Amplifier and filters
- Small preamp or op-amp to boost mic output and reduce noise.
- Buttons and user interface
- One to three buttons for record, stop, and playback.
- Enclosure and wiring tools
- Soldering iron, wires, protoboard, and a small case for protection.
I recommend buying modules rather than individual chips if this is your first build. They are cheaper in time and simpler to wire.
Simple DIY voice recorder — step-by-step
This basic build saves WAV files to a microSD card using an easy microcontroller. It’s a great project for beginners learning how to make voice recorder devices.
- Gather parts and tools
- Microphone module, microcontroller with SD support, microSD card, battery, wires, breadboard or perfboard.
- Wire the microphone to the ADC input
- Connect mic VCC, GND, and output to the ADC pin on the microcontroller. Add a simple bias resistor if using an electret mic.
- Add a preamp if needed
- Use a small op-amp module for clearer signal and better volume.
- Connect microSD module
- Wire SPI pins or use the microcontroller’s SD interface. Ensure proper voltage levels.
- Upload firmware or sketch
- Use a simple recorder sketch that reads ADC samples, formats them as PCM, and writes WAV headers to the card.
- Test and adjust levels
- Record sample audio and listen. Lower gain to avoid clipping and raise gain for quiet voices.
This approach shows how to make voice recorder devices quickly. It also helps you learn how ADC sampling and file writing work.

Building a more advanced digital voice recorder
If you want better quality and features, this section covers components and design choices for a higher-end DIY recorder.
- Choose the right microphone
- MEMS mics offer consistent digital output and low noise. Electret mics are cheap and versatile.
- Use a proper audio codec or I2S interface
- Audio codec chips handle ADC, DAC, and gain control. Using I2S with an ESP32 gives cleaner streaming and higher sample rates.
- Implement power management
- Add a battery charging circuit, low-power sleep modes, and a power switch.
- Add a UI and controls
- Include LED indicators, a small OLED screen, or multi-button controls for marking and seeking recordings.
- Consider file formats and compression
- Save WAV for simplicity or use compressed formats like Ogg/Vorbis for more hours on the same card.
Plan the PCB layout to minimize noise. Keep analog traces short and separate from digital lines. This kind of design shows deeper knowledge of how to make voice recorder systems that last and sound good.

Software, formats, and settings
Software choices directly influence battery life and audio quality when you learn how to make voice recorder firmware.
- Sampling rate and bit depth
- Use 44.1 kHz and 16-bit for near-CD quality. Use 22.05 kHz and 16-bit for speech-only projects to save space.
- File format choices
- WAV is simple and universal. Compressed formats save storage but need CPU cycles to encode.
- Buffering and SD writes
- Use a ring buffer to collect samples then write in blocks to avoid SD corruption and stuttering.
- Implement meta data
- Add timestamps or simple text tags for each file so you can find clips later.
Testing different settings helps find the right balance between quality and storage. Choosing efficient codecs and buffering routines is a core part of how to make voice recorder projects that are reliable day to day.

Testing, troubleshooting, and practical tips
Good testing saves time. These checks are essential if you want a dependable device and to learn how to make voice recorder systems properly.
- Test in real environments
- Record in quiet and noisy places. Note how the mic handles different volumes.
- Check for clipping and noise
- Watch input levels. If clipped, lower preamp gain or move the mic away.
- Monitor battery life
- Measure current draw in active and sleep modes. Optimize firmware for low-power states.
- Fix SD write errors
- Use proper file close routines and CRC or simple checks to detect corrupted files.
- Use shielding and grounding
- Shield mic wiring from high-frequency digital lines to reduce hiss and interference.
When I first built a recorder, I skipped shielding and saw constant noise. Adding a grounded shield fixed it quickly. Small steps like this cut debugging time.

Uses, benefits, and practical applications
Making your own recorder gives control and saves money. Here are common uses and benefits when you learn how to make voice recorder devices.
- Field interviews and journalism
- Customize battery life and file naming for long shoots.
- Lecture capture and study notes
- Add timestamp markers to find topics quickly.
- Wildlife and sound monitoring
- Make long-term loggers that wake on sound to save power.
- Hobby audio projects
- Integrate with sensors or add remote upload features.
Building a recorder teaches hardware, firmware, and audio basics. That knowledge is useful in many other electronics projects.
Limitations and legal and ethical considerations
A responsible builder understands rules and limits. Recording laws and privacy matter when you learn how to make voice recorder devices.
- Know local laws
- Many places require consent from at least one or all parties. Always check local regulations.
- Respect privacy and security
- Protect stored recordings with encryption or physical security if they contain sensitive info.
- Hardware limits
- Small DIY devices may not match professional gear in noise floor or dynamic range.
- Reliability tradeoffs
- Low-cost parts can fail. Design for safe shutdowns and file integrity to avoid loss.
Be transparent and user-focused. Ethical design matters as much as technical skill.

Personal experience, mistakes to avoid, and practical tips
I built several recorders for classes and fieldwork. Here are lessons I learned and practical tips to help you avoid common traps.
- Lesson: Always test real use cases
- I once tested only in a quiet room and failed in the field. Always test with expected background noise.
- Mistake: Underestimating power draw
- Early prototypes drained batteries fast. Use sleep modes and realistic duty cycles.
- Tip: Use modular parts first
- Use breakout modules for mic, SD, and power before designing a PCB. It speeds up iteration.
- Tip: Keep firmware simple and robust
- Start with plain WAV saving. Add compression later if needed. Simple systems fail less often.
These real lessons will help you make smarter choices while learning how to make voice recorder devices.
Frequently Asked Questions of how to make voice recorder
How long does it take to build a simple voice recorder?
A basic recorder can be assembled and tested in a day if you have parts and a working microcontroller sketch. More polished builds with a custom case and better firmware can take several weekends.
What microphone is best for DIY recorders?
MEMS microphones give clean, consistent results for digital projects, while electret microphones are low cost and flexible. Choose based on budget and the environment you’ll record in.
Can I save hours of audio to a microSD card?
Yes. Using lower sample rates or a compressed format lets you store many hours on a single card. Make sure to test file integrity after long recordings.
Do I need programming skills to make a voice recorder?
Basic programming helps for microcontroller builds, but many examples and libraries exist to simplify setup. Using modules and sample code reduces the learning curve.
Is it legal to record conversations with this device?
Legal rules depend on your jurisdiction and whether one-party or two-party consent is required. Always get consent when in doubt and follow local laws.
Conclusion
Making your own recorder teaches audio basics, electronics, and practical design skills. You can start with a simple one-button recorder or build an advanced digital unit with long battery life and high quality. Try a modular first build, test in real conditions, and iterate based on what you learn. If you liked this guide, try the simple project today, share your results, or ask questions below — I’d love to help you improve your design.