Optimize settings, upgrade cooling, and prioritize network and encoding for smooth streaming.
I’ve spent years building and streaming from gaming laptops. I know how to optimize a gaming laptop for streaming so you get consistent FPS, clear video, and low latency. This guide walks through hardware tweaks, software settings, network steps, and real-world tips. Read on to make your laptop stream-ready with practical, tested advice.
Why optimizing a gaming laptop for streaming matters
Streaming from a laptop is harder than streaming from a desktop. Laptops have tighter power and thermal limits. Left unoptimized, you’ll see frame drops, thermal throttling, and poor stream quality.
Optimizing keeps gameplay smooth and preserves hardware. It also gives viewers a stable, watchable feed. Below I cover easy fixes and deeper tweaks so you can optimize a gaming laptop for streaming with confidence.
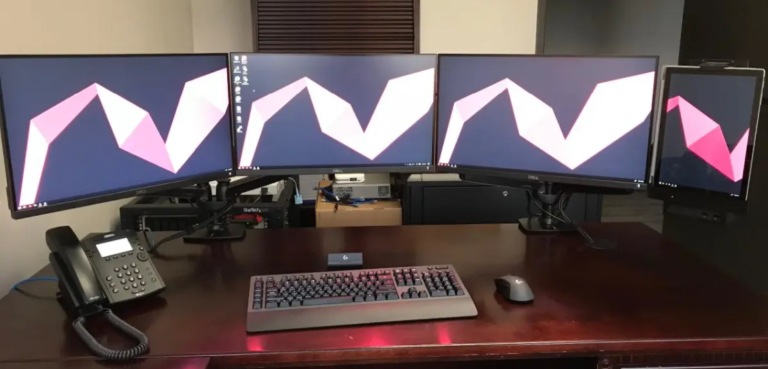
Source: fiverr
Plan your streaming setup: goals and constraints
Start with clear goals. Decide the stream resolution and frame rate you want (720p30, 1080p60, etc.). Pick the platform (Twitch, YouTube, Facebook). Then list your laptop specs: CPU model, GPU model, RAM size, storage type, and measured upload speed.
Estimate system headroom. If your laptop can run games at 1080p60 locally, it may still need help to encode that same feed and stream. Knowing exact specs removes guesswork when you optimize a gaming laptop for streaming.
Hardware upgrades and tweaks
Laptop upgrades are limited but effective. Invest in the few parts that make the biggest difference for streaming performance and stability.
- RAM upgrade. Move to 16 GB or 32 GB if possible. More RAM reduces swapping and smooths multitasking (game + OBS + chat + browser).
- SSD storage. Put games and your streaming app on an NVMe or SATA SSD. Faster drives cut stutter from I/O spikes and shorten load times.
- External GPU (eGPU). If your laptop supports Thunderbolt 3/4, an eGPU can offload gaming or encoding. It’s expensive, but it can transform older machines.
- Cooling pad. A quality cooling pad lowers component temperatures a few degrees. Cooler hardware reduces throttle events and keeps clocks stable.
- Power plan tweaks. Use the high-performance or manufacturer performance profile while plugged in. This helps keep CPU/GPU clocks steady during long streams.
I once upgraded a laptop from 8 GB to 16 GB and saw fewer stutters during scene changes. Small, targeted upgrades give big real-world gains when you learn how to optimize a gaming laptop for streaming.
Best software and encoder settings
Your streaming app and encoder choice matter most. The two common apps are OBS Studio and Streamlabs Desktop. Pick an encoder that reduces CPU load while keeping quality high.
- Use hardware encoding when possible. NVENC (NVIDIA), AMD VCE/AV1, and Intel Quick Sync shift work off the CPU.
- For 1080p60 streaming, NVENC with ~6000 kbps is a solid baseline on most platforms. Reduce bitrate for weaker connections.
- If you must use x264, use the veryfast or faster presets to keep CPU usage manageable.
- Set rate control to CBR (constant bitrate) for stability on Twitch and YouTube.
- Record to a separate drive or folder to avoid write contention with the streaming app.
I run short local recordings while testing changes. That shows resource use without risking a live show. This helped me learn how to optimize a gaming laptop for streaming without breaking the stream.
Encoder choice: quick decision guide
Choose an encoder using this simple logic:
- If you have an NVIDIA GPU with NVENC (Turing or newer), use NVENC (new) for best quality per CPU load.
- If you have a recent AMD GPU or Intel iGPU with Quick Sync, use the matching hardware encoder.
- If CPU usage is high and you can’t use hardware encoders, drop x264 preset to faster/veryfast or lower resolution.
Hardware encoders free CPU cycles for the game and other tasks. They also reduce the chance of frame drops when GPU/CPU are taxed.
Example settings for NVENC 1080p60:
- Encoder: NVENC (new)
- Rate control: CBR
- Bitrate: 6000 kbps
- Keyframe interval: 2 seconds
- Preset: performance or quality depending on GPU headroom
- Profile: high
Game settings and in-game optimizations
Lower in-game settings to free resources for encoding. Aim for steady FPS rather than ultra graphics.
- Reduce resolution scale, shadows, and post-processing. These hit GPU hard.
- Cap game FPS slightly above your stream FPS (for a 60 fps stream, cap the game at 75–120 fps). This reduces frame variance and input lag.
- Enable dynamic resolution if the game supports it to maintain framerate during heavy scenes.
- Close overlays and background apps that use GPU or CPU cycles.
I lowered shadows and ambient effects on an action title and got a steady stream with nearly the same visual appeal. That tradeoff keeps both viewers and your laptop happy.

Source: lenovo.com
Network optimization for reliable streams
Upload speed and stability matter more than raw download speed. Your chosen bitrate must fit your sustained upload capacity.
- Test upload speed with a reliable tester. Use no more than 60–75% of your upload for your stream. Leave headroom for system updates, chat, and other apps.
- Use wired Ethernet whenever possible. It reduces packet loss, jitter, and latency.
- If you must use Wi‑Fi, prefer 5 GHz and sit close to the router. Choose a less crowded channel and avoid interference.
- Enable QoS (Quality of Service) on the router to prioritize streaming traffic if supported.
- For mission-critical streams, consider a second internet connection or a bonding service to combine links and reduce single-point failures.
If your upload is 10 Mbps, a 6000 kbps stream leaves little headroom. Lower bitrate or resolution in that case. I switched to wired Ethernet once and immediately stopped seeing dropped frames.

Source: dell.com
Audio, camera, and capture device tips
Audio and camera quality matter as much as game visuals. Poor audio or a bad webcam drive viewers away faster than a slightly lower game resolution.
- Use a dedicated USB microphone or an XLR mic with an audio interface. Built-in mics usually sound thin and pick up unwanted noise.
- Set microphone gain to avoid clipping. Add a compressor or limiter in your audio chain to keep levels stable.
- Use a webcam that supports 1080p, or use an HDMI capture card with a higher-quality camera for professional results.
- Place the camera at eye level and use soft, diffused lighting to improve on-camera appearance.
- Route audio channels correctly in OBS to prevent feedback loops and to keep game, mic, and system audio separate for recording and VOD edits.
I run quick voice checks before each stream. That catches gain issues and keeps audio consistent for viewers.
Cooling, power, and thermal management
Thermals control performance on laptops. Keep temperatures low to avoid thermal throttle and dropped clocks.
- Clean vents and fans regularly. Dust blocks airflow and raises temperatures.
- Use a laptop stand to improve bottom intake and overall circulation.
- Undervolt the CPU where safe. Small, tested undervolts cut temperatures and can hold clocks steady longer. Follow guides and stay within safe limits—this can affect warranty if you use unsupported tools.
- Adjust fan curves using manufacturer software if available. Higher fan speed under load prevents short bursts of throttle.
- Avoid streaming in very hot rooms. Cooler ambient temperatures make a real difference during long sessions.
I applied a modest undervolt and reduced peak temps during marathon streams. The result was fewer drops and more consistent clock speeds.
Performance monitoring and troubleshooting
Watch your system metrics to find the bottleneck. Good monitoring helps you fix issues quickly.
- Monitor CPU, GPU, memory, disk I/O, temperatures, and clocks. OBS has a stats window that shows dropped frames and encoder load.
- Check GPU/CPU loads while gaming and streaming. High CPU with x264 means consider hardware encoding instead.
- Watch temperatures and clock speeds. If clocks dip under load, thermal throttling is likely.
- Log dropped frames and reconnects to spot network patterns.
- Change one setting at a time when testing. That way you know what helped or hurt.
When I had repeated dropped frames, OBS pointed to network packet loss. After switching to wired Ethernet and lowering bitrate slightly, dropped frames stopped.
Practical checklist: step-by-step to optimize your laptop
Use this checklist before your next stream. It’s ordered from fastest wins to deeper fixes.
- Confirm upload speed and pick a bitrate that uses under 70% of your available upload.
- Switch to wired Ethernet or a strong 5 GHz Wi‑Fi connection.
- Set OBS to a hardware encoder (NVENC, AMD VCE, or Intel Quick Sync).
- Lower game settings that hit the GPU hardest (shadows, effects, post-process).
- Upgrade RAM or SSD where it will help most.
- Clean vents, use a cooling pad, and put the laptop on a stand.
- Test with a short local recording and a private stream to verify settings.
- Monitor live stats in OBS and adjust as needed during the test.
Following this sequence helped me make fast, measurable gains when I learned how to optimize a gaming laptop for streaming.
Common mistakes and how to avoid them
Avoid these frequent errors that cost stream quality and uptime.
- Pushing bitrate above your upload capacity. This causes dropped frames and buffering.
- Using x264 on a weak CPU. Hardware encoders are usually the better choice on laptops.
- Ignoring thermal management. Overheating leads to throttling and crashes.
- Running many background apps. Close unused programs before streaming to free resources.
- Not testing. Always run a short private test before going live to catch issues early.
I once streamed with a too-high bitrate over weak Wi‑Fi and had repeated disconnects. The fix was simple: lower bitrate and switch to wired internet.
Advanced tips for serious streamers
If you want pro-level quality and reliability, consider these advanced strategies.
- Use a second laptop for encoding via NDI or a capture card. Offloading encoding removes stress from your gaming machine.
- Use scene buffering and studio mode for smooth, professional transitions and overlays.
- Run a lightweight Linux-based streaming box for dedicated encoding if the laptop can’t keep up.
- Use AV1 hardware encoding if your GPU supports it. AV1 can improve perceived quality at lower bitrates, but support varies by platform and hardware.
These setups require extra gear and time to configure. They can, however, transform a hobby stream into a stable, high-quality broadcast.
Read About How Much Does An Average Laptop Weigh: Real Truth for 2026
Frequently Asked Questions of How to optimize a gaming laptop for streaming
How much upload speed do I need for 1080p60 streaming?
For 1080p60, aim for a stable 6–8 Mbps upload. That covers the stream plus a small buffer for chat and other apps. If your connection is shared, lean higher or lower the bitrate accordingly.
Which encoder should I use on a gaming laptop?
Use hardware encoders when available: NVENC (NVIDIA), AMD VCE/AV1, or Intel Quick Sync. They offload encoding from the CPU and keep gameplay smooth. Use x264 only when hardware options aren’t available or for specific quality needs.
Can cooling pads significantly improve performance?
Yes. A good cooling pad and clean vents lower temps and reduce thermal throttling. Exact gains vary by laptop, but they often translate to more stable clocks and longer sustained performance.
Is it better to lower game settings or stream settings?
Lower game settings first to free GPU cycles for encoding. If you still lack performance or bandwidth, then reduce stream resolution or bitrate to match your upload speed and system headroom.
Should I record while streaming?
Recording adds load. If your laptop has headroom, record locally for VODs. If not, skip recording or use lower-quality, lower-bitrate recordings to avoid impacting live performance.
Conclusion
You can stream well from a gaming laptop with the right mix of settings, upgrades, and habits. Focus on hardware encoding, good thermal management, a stable network, and sensible in-game settings. Test changes, monitor stats, and prioritize steady frames over ultra visuals.
Take action today: run a short private stream, apply one or two tweaks from this guide, and watch the difference. Share your results or questions below and subscribe for more practical streaming tips.