Your laptop camera is usually grainy because of poor light, a dirty lens, weak settings, outdated drivers, or a low-quality webcam.
If you are asking, “why is my laptop camera grainy,” you are not alone. Grainy video is common during Zoom calls, online classes, interviews, and FaceTime chats. The good news is that many camera problems come from simple issues you can fix in a few minutes. This guide explains the main causes, tested solutions, useful settings, and signs that your built-in webcam may need replacement.

Why is my laptop camera grainy?
A laptop camera creates a clear image by capturing light through a tiny lens and turning it into digital video. When the room is dark, the camera must increase its digital exposure. This makes the image brighter, but it also adds random specks called noise.
This is the main reason why is my laptop camera grainy in low-light rooms. Built-in webcams often have small sensors, so they cannot capture as much light as a phone or dedicated camera.
Other common causes include:
• A smudged or dusty camera lens
• Backlighting from a window or lamp
• Low video resolution in the calling app
• Weak internet or low upload speed
• Outdated camera drivers
• Privacy settings that limit camera access
• A damaged webcam or loose internal connection
• Automatic exposure or focus settings that are not working well
It also helps to separate camera grain from video compression. Grain looks like fine colored dots across the image. Compression looks more like blurry blocks, frozen details, or smeared movement.

Common reasons your laptop camera looks noisy
Poor lighting
Light is the biggest factor in webcam quality. A dark room forces the camera to use a slower shutter speed or higher digital gain. The result may look bright but noisy.
Try facing a window during the day, but do not sit with the window behind you. The camera sees the bright background and may make your face too dark.
A soft lamp placed behind your screen can help. It should point toward your face rather than shine directly into the lens.
A dirty camera lens
Laptop cameras collect fingerprints, dust, and skin oils. Even a thin film can make the image look hazy, soft, or grainy.
Clean the lens with a dry microfiber cloth. Avoid paper towels, rough fabric, and household sprays. If the camera has a sliding privacy cover, clean both the cover and the lens area.
A low-quality built-in webcam
Many laptops still use basic 720p webcams. These cameras may be fine in bright daylight but struggle in rooms with soft or uneven light.
A 720p camera can produce a usable image, but resolution alone does not guarantee quality. Sensor size, lens quality, image processing, and light control matter just as much.
Low resolution in the video app
Video apps may lower camera quality to save bandwidth or improve performance. Some apps also begin with low settings by default.
Check the camera settings in your meeting app. Look for options such as:
• Video resolution
• HD video
• Camera selection
• Low-light adjustment
• Automatic video quality
Some services control video quality on their servers. In that case, your camera may look clear in its preview but worse during a live call.
Weak internet or unstable Wi-Fi
A poor connection can make video look blurry, blocky, or pixelated. This can seem similar to grain.
Run a speed test while no large downloads are active. If possible, move closer to your router, use a wired connection, or pause streaming on other devices.
A slow connection does not usually create true camera noise. It reduces the quality of the video stream after your camera has already captured it.
Outdated or faulty drivers
Windows and macOS use camera software to communicate with the webcam. A driver or system update may fix problems with exposure, focus, color, or camera access.
Install system updates from your laptop maker or operating system settings. Avoid random driver sites, since they can provide unsafe or incorrect files.
A blocked camera or privacy setting
Some laptops include a physical camera shutter. Others use a keyboard key or privacy utility to disable the camera.
If the camera image is dark, black, or covered by a warning, check:
• The physical privacy shutter
• The camera function key
• App permissions
• Antivirus privacy controls
• Browser camera permissions
These issues may not cause grain by themselves, but they can make troubleshooting confusing.

How to fix a grainy laptop camera
Work through these steps in order. Start with the simple fixes before changing drivers or buying new equipment.
1. Clean the camera lens
Turn off the camera app. Wipe the lens gently with a clean microfiber cloth.
Do not spray liquid onto the laptop. If the lens has stubborn residue, lightly dampen a corner of the cloth with water, then wipe the area carefully. Let it dry before opening the camera again.
2. Improve the light in front of you
Place your main light behind or beside the camera. A small desk lamp can work well.
Use soft, even light. A harsh lamp directly above your head may create deep shadows. A bright window behind you can also confuse automatic exposure.
For a quick setup:
-
Face the brightest part of the room.
-
Put a lamp near the screen.
-
Keep bright windows behind the camera.
-
Remove strong lights from the background.
-
Check the preview before joining a call.
This step often explains why is my laptop camera grainy, especially during evening meetings.
3. Restart the camera and computer
Close every app that may use the webcam. This includes meeting apps, browser tabs, messaging tools, and camera utilities.
Restart the laptop, then open only one camera app. Another program may be controlling the camera with different settings or limiting its quality.
4. Check the camera preview
Use the built-in Camera app on Windows or a camera preview tool on macOS. Look at the image before opening Zoom, Teams, Google Meet, or another service.
If the preview is grainy, the problem is likely lighting, the lens, the camera hardware, or the operating system. If the preview is clear but the meeting looks poor, check the app and network.
5. Select the correct camera
Your computer may be using the wrong camera. This can happen after connecting a monitor, USB webcam, docking station, or virtual camera.
Open the video settings in your app and choose the built-in webcam or external camera you want. Then close and reopen the app.
6. Turn on HD video when available
Open your meeting app’s video settings. Enable HD video if your camera and internet connection support it.
Keep in mind that HD settings may increase data use. If your connection is weak, the app may lower quality again to prevent freezing.
7. Update the operating system and drivers
On Windows, check Windows Update and Device Manager. In Device Manager, look under Cameras or Imaging devices.
On macOS, install available macOS updates. Apple typically includes camera improvements through system updates rather than separate webcam driver downloads.
Restart after updating. Then test the camera in a simple preview app.
8. Close apps that use system resources
A busy processor can affect video quality. Close games, large downloads, photo editors, virtual machines, and extra browser tabs.
Open Task Manager on Windows or Activity Monitor on macOS to see whether the processor or memory is heavily used. Keep the laptop plugged in if battery-saving mode limits performance.
9. Check for camera enhancements
Some camera apps add automatic background blur, low-light correction, skin smoothing, or virtual effects. These features can reduce sharpness and create strange artifacts.
Turn off enhancements one at a time. Test the image after each change so you know which setting helped.
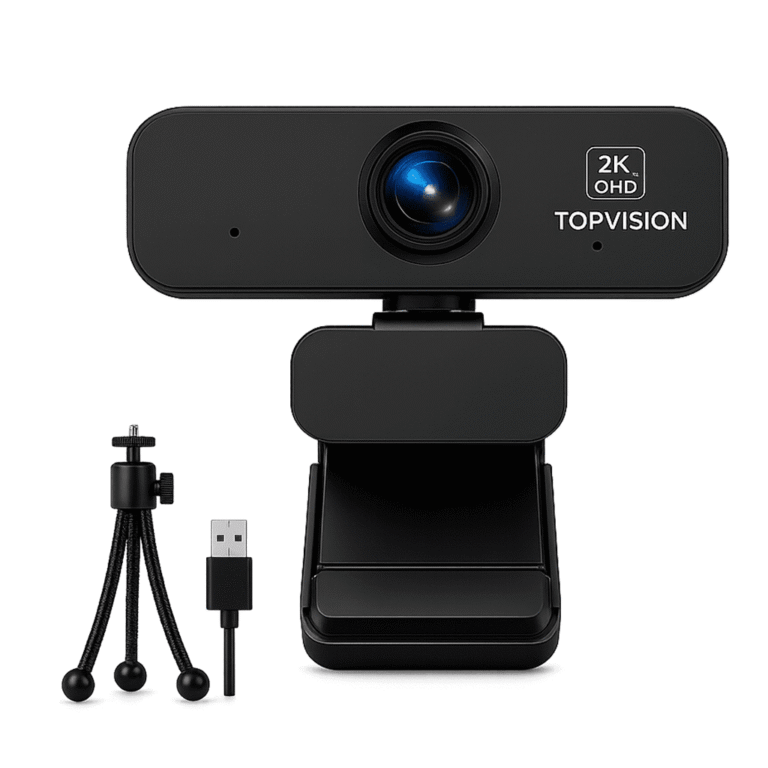
10. Test with an external webcam
Connect a trusted USB webcam and compare it with the built-in camera. If the external webcam is clear under the same lighting, the laptop’s built-in camera may be limited or damaged.
This simple comparison is one of the best ways to find out why is my laptop camera grainy.

How to improve laptop camera quality for video calls
Even a basic webcam can look better with a few changes. Think of your camera like a small window. A clean window and good light matter more than complicated settings.
Use a simple three-point lighting setup
You do not need expensive studio gear. Try this arrangement:
• Key light: A lamp or window in front of you
• Fill light: A softer light on the darker side of your face
• Background light: A small light behind you, if the room looks flat
Keep the main light close to eye level. This reduces harsh shadows and helps your face look natural.
Keep the camera at eye level
A camera below your face can create an unflattering angle. It may also capture more of the ceiling and background.
Raise the laptop on a stable stand or a few sturdy books. Make sure the laptop cannot slide or fall.
Sit at a reasonable distance
Do not sit too close to the lens. Your face should fill much of the frame, while your head and shoulders remain visible.
A distance of about two to three feet often works well, but the best position depends on the lens and screen size.
Use a calm background
A busy background does not usually cause grain, but it can make video compression more noticeable. Simple backgrounds help the viewer focus on you.
Avoid sitting directly in front of bright lights, reflective surfaces, or fast-moving objects.
Keep the lens steady
A loose laptop screen can make the picture appear soft during movement. Set the screen angle before the call and avoid touching the display.
If you type often, place the laptop on a solid surface. Desk vibration can make a low-quality camera look worse.
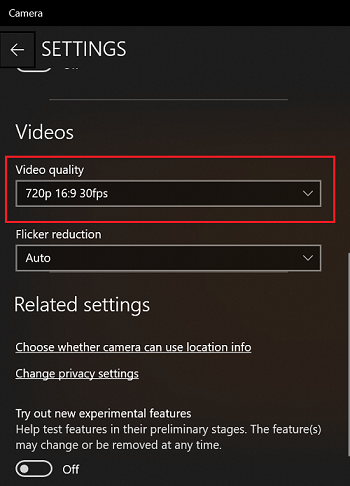
Choose the right video resolution
Higher resolution can improve detail, but it also uses more processing power and bandwidth. If the video stutters, a lower resolution may provide a smoother experience.
Clear, stable 720p video is often better than unstable 1080p video. The best setting depends on your camera, lighting, computer, and internet connection.

How to tell whether the problem is the camera or the internet
A quick test can help you identify the cause.
First, open the camera preview on your laptop. Move your hand slowly in front of the camera and inspect the image.
If the preview has tiny colored dots, the room is dark, or the image is cloudy, focus on the lens, lighting, and camera hardware. If the preview is clear but a live call is blurry, investigate the internet connection and app settings.
Use this comparison:
• Grain in every app: likely lighting, lens, camera hardware, or system settings
• Clear preview but poor meeting video: likely app settings, network quality, or server compression
• Blurry video only when moving: likely low light, slow shutter speed, or compression
• Frozen video and blocky areas: likely network or computer performance
• Black screen: likely privacy controls, permissions, driver problems, or hardware failure
I have found that many people replace their webcam too early. Testing the camera in two different apps first can prevent an unnecessary purchase.

When should you replace your laptop webcam?
A new webcam may help if your built-in camera remains grainy after cleaning the lens, improving light, updating software, and testing another app.
Consider an external webcam when:
• Your laptop camera is only 720p and you need sharper video
• You attend frequent online meetings
• You create tutorials, streams, or video content
• Your room has difficult lighting
• The built-in camera has physical damage
• You need better focus, color, or microphone quality
Look for a webcam with good low-light performance, autofocus, and at least 1080p resolution. Do not choose based on resolution alone. A well-designed 1080p webcam can look better than a cheap 4K model with a small sensor and poor image processing.
An external camera also gives you more control over placement. You can position it at eye level instead of relying on the laptop screen.
Mistakes to avoid when fixing a grainy camera
Some troubleshooting steps can make the problem worse.
• Do not clean the lens with abrasive fabric.
• Do not spray cleaner directly onto the laptop.
• Do not download unknown camera drivers.
• Do not assume 4K automatically means better video.
• Do not sit with a bright window behind you.
• Do not change many settings at once.
• Do not ignore internet problems when the camera preview looks clear.
• Do not cover the camera with thick tape, since adhesive can leave residue.
The best method is controlled testing. Change one thing, test the camera, and note the result. This approach takes less time than guessing.
Camera privacy and security tips
A laptop camera should work well without putting your privacy at risk. Only allow trusted apps to access it.
Review camera permissions in your operating system and browser. Remove access from apps you no longer use. Keep your operating system, browser, and security software updated.
A physical privacy shutter can add peace of mind. However, it will not improve image quality when open. If the shutter is partly closed, it may create a dark or hazy image.
If the camera light turns on unexpectedly, close active apps and check which program has access. A security scan may also be useful if the behavior continues.
Frequently Asked Questions
Why is my laptop camera grainy in low light?
Your webcam uses digital gain to brighten a dark scene. That gain also increases image noise, which appears as grain. Add soft light in front of your face to improve the picture.
Why is my laptop camera grainy even in a bright room?
The lens may be dirty, or the camera may be facing a bright background. Clean the lens, move the light in front of you, and test the camera in another app.
Can poor internet make my laptop camera look grainy?
Poor internet usually causes blur, blocky pixels, freezing, or reduced resolution rather than true grain. Compare the live call with the camera preview to separate network problems from camera problems.
Will updating my camera driver fix grainy video?
It can help when the issue comes from faulty camera software, exposure controls, or compatibility problems. However, drivers cannot overcome a dirty lens, poor lighting, or a low-quality webcam sensor.
Is a 1080p external webcam better than a laptop camera?
Often, yes, especially when the external webcam has a larger sensor, better lens, and stronger low-light processing. Good lighting still matters, so a new webcam may not solve every image problem.
Why is my laptop camera grainy only at night?
Night scenes contain less light, so the webcam increases exposure and digital gain. Use a lamp near the screen and avoid relying only on ceiling lights.
How can I make my laptop camera clearer without buying anything?
Clean the lens, face a soft light source, move away from bright windows, close demanding apps, and enable HD video when your connection allows it. These free changes often produce a noticeable improvement.
Conclusion
A grainy laptop camera is usually caused by poor lighting, a dirty lens, low video settings, weak internet, outdated software, or limited webcam hardware. Start with the simplest fixes: clean the lens, place light in front of your face, test the camera preview, and check your app settings.
If the image stays noisy in every app, compare the built-in webcam with an external one. The right lighting and a stable setup can make even an older laptop camera look much better. Try these steps before replacing your device, and share this guide with someone preparing for an important video call.